
| 일 | 월 | 화 | 수 | 목 | 금 | 토 |
|---|---|---|---|---|---|---|
| 1 | 2 | 3 | 4 | 5 | ||
| 6 | 7 | 8 | 9 | 10 | 11 | 12 |
| 13 | 14 | 15 | 16 | 17 | 18 | 19 |
| 20 | 21 | 22 | 23 | 24 | 25 | 26 |
| 27 | 28 | 29 | 30 | 31 |
- IAM
- SAA-C03
- 네트워크
- Ebs
- Kubernetes
- 3 TIER
- vyos
- FTP
- docker
- AWS
- GNS3
- aws saa
- eks
- aws cloud
- EC2
- aws cloud school
- AWS 자격증
- aws cloud school 8
- vmware
- linux
- Troubleshooting
- NLB
- aws cloud shcool 8
- NAT
- EC2 인스턴스
- Firewall
- ALB
- DNS
- aws SAA-c03
- tftp
- Today
- Total
나의 공부기록
[VMWare] 24-2. IaC - Ansible & PlayBook 본문
Ubuntu 템플릿 생성
1. 템플릿 구성


- bounding(Linux 용어), Timing(Window 용어) = 다수의 NIC를 묶어주는 개념
- 대역폭을 늘리거나 active-stanby 구조(eth0을 사용하다가 문제가 생기면 eth1으로 대체되는 개념)를 가져가고 싶을 때 사용


- 별도로 root 패스워드 설정하지 않음
➡️CentOS와의 차이점❗

- 체크하지 않으면 SSH 설치❌ ➡️ SSH 접속 불가능

2. ubuntu-tem 접속

3. root 패스워드 설정 및 접속

- Ubunut 네트워크 설정 파일 : /etc/netplan/00-installer-config.yaml
4. root 로그인 허용
root@ubuntu-tem:/home/user1# vi /etc/ssh/sshd_config- 주석 해제

- sshd 재시작
root@ubuntu-tem:/home/user1# systemctl restart sshd
5. 방화벽 - ufw
- Ubunut의 방화벽(=ufw) 기본 설정 = inactive
root@ubuntu-tem:~# ufw status
Status: inactive
6. apt update
root@ubuntu-tem:~# apt update -y
7. 서버 종료 후, clone 생성 - m20

8. m20 설정
- IP 설정
root@ubuntu-tem:~# vi /etc/netplan/00-installer-config.yaml

- hostname 변경
root@ubuntu-tem:~# hostnamectl set-hostname m20
root@ubuntu-tem:~# su
root@m20:~#
PlayBook - when(특정한 상황이 충족됐을 때, 모듈을 수행)
✅ 조건
- Linux 배포판 : CentOS ➡️ yum을 통해 httpd 설치
- Linux 배포판 : Ubuntu ➡️ apt를 통해 nginx 설치
1. playbook 생성
[root@control_node ans]# vi when.yml

- name: install_web_pb
  hosts: all
  tasks:
  # CentOS라면 httpd 설치
  - name: install_httpd
    yum:
      name: httpd
      state: present
    when: ansible_distribution == 'CentOS'
    register: install_result1 # 결과값 result1 변수에 저장

  # result1 결과값 확인
  - name: show_result1
    debug:
      var: install_result1
2. playbook 실행
[root@control_node ans]# ansible-playbook when.yml -i 0307.inven

PLAY [install_web_pb] ************************************************************

TASK [Gathering Facts] ***********************************************************
ok: [211.183.3.10]

TASK [install_httpd] *************************************************************
changed: [211.183.3.10]

TASK [show_result1] **************************************************************
ok: [211.183.3.10] => {
    "install_result1": {
        "changed": true,
        "changes": {
            "installed": [
                "httpd"
            ]
        },
        "failed": false,
        "msg": "",
        "rc": 0,
        "results": [
            "Loaded plugins: fastestmirror\nLoading mirror speeds from cached hostfile\nResolving Dependencies\n--> Running transaction check\n---> Package httpd.x86_64 0:2.4.6-99.el7.centos.1 will be installed\n--> Processing Dependency: httpd-tools = 2.4.6-99.el7.centos.1 for package: httpd-2.4.6-99.el7.centos.1.x86_64\n--> Processing Dependency: /etc/mime.types for package: httpd-2.4.6-99.el7.centos.1.x86_64\n--> Processing Dependency: libaprutil-1.so.0()(64bit) for package: httpd-2.4.6-99.el7.centos.1.x86_64\n--> Processing Dependency: libapr-1.so.0()(64bit) for package: httpd-2.4.6-99.el7.centos.1.x86_64\n--> Running transaction check\n---> Package apr.x86_64 0:1.4.8-7.el7 will be installed\n---> Package apr-util.x86_64 0:1.5.2-6.el7_9.1 will be installed\n---> Package httpd-tools.x86_64 0:2.4.6-99.el7.centos.1 will be installed\n---> Package mailcap.noarch 0:2.1.41-2.el7 will be installed\n--> Finished Dependency Resolution\n\nDependencies Resolved\n\n================================================================================\n Package           Arch         Version                     Repository     Size\n================================================================================\nInstalling:\n httpd             x86_64       2.4.6-99.el7.centos.1       updates       2.7 M\nInstalling for dependencies:\n apr               x86_64       1.4.8-7.el7                 base          104 k\n apr-util          x86_64       1.5.2-6.el7_9.1             updates        92 k\n httpd-tools       x86_64       2.4.6-99.el7.centos.1       updates        94 k\n mailcap           noarch       2.1.41-2.el7                base           31 k\n\nTransaction Summary\n================================================================================\nInstall  1 Package (+4 Dependent packages)\n\nTotal download size: 3.0 M\nInstalled size: 10 M\nDownloading packages:\n--------------------------------------------------------------------------------\nTotal                                              498 kB/s | 3.0 MB  00:06     \nRunning transaction check\nRunning transaction test\nTransaction test succeeded\nRunning transaction\n  Installing : apr-1.4.8-7.el7.x86_64                                       1/5 \n  Installing : apr-util-1.5.2-6.el7_9.1.x86_64                              2/5 \n  Installing : httpd-tools-2.4.6-99.el7.centos.1.x86_64                     3/5 \n  Installing : mailcap-2.1.41-2.el7.noarch                                  4/5 \n  Installing : httpd-2.4.6-99.el7.centos.1.x86_64                           5/5 \n  Verifying  : httpd-2.4.6-99.el7.centos.1.x86_64                           1/5 \n  Verifying  : mailcap-2.1.41-2.el7.noarch                                  2/5 \n  Verifying  : apr-1.4.8-7.el7.x86_64                                       3/5 \n  Verifying  : httpd-tools-2.4.6-99.el7.centos.1.x86_64                     4/5 \n  Verifying  : apr-util-1.5.2-6.el7_9.1.x86_64                              5/5 \n\nInstalled:\n  httpd.x86_64 0:2.4.6-99.el7.centos.1                                          \n\nDependency Installed:\n  apr.x86_64 0:1.4.8-7.el7                    apr-util.x86_64 0:1.5.2-6.el7_9.1 \n  httpd-tools.x86_64 0:2.4.6-99.el7.centos.1  mailcap.noarch 0:2.1.41-2.el7     \n\nComplete!\n"
        ]
    }
}

PLAY RECAP ***********************************************************************
211.183.3.10               : ok=3    changed=1    unreachable=0    failed=0    skipped=0    rescued=0    ignored=0
3. playbook 동작 확인 - m10에 httpd 설치 확인

실습 08 - when모듈
문제
start-when.yml을 만들어 web 서버에 잘 접속이 되도록 해보세요.
풀이
1. playbook 생성
[root@control_node ans]# vi start-when.yml

- name: install_web_pb
  hosts: all
  tasks:
  - name: install_httpd
    yum:
      name: httpd
      state: present
    when: ansible_distribution == 'CentOS'
    register: install_result1

  - name: show_result1
    debug:
      var: install_result1
  - name: stopped_firewalld
    service:
      name: firewalld
      state: stopped
      enabled: false

  - name: start_httpd
    service:
      name: httpd
      state: started
      enabled: yes
2. playbook 실행
[root@control_node ans]# ansible-playbook start-when.yml -i 0307.inven

PLAY [install_web_pb] ************************************************************

TASK [Gathering Facts] ***********************************************************
ok: [211.183.3.10]

TASK [install_httpd] *************************************************************
ok: [211.183.3.10]

TASK [show_result1] **************************************************************
ok: [211.183.3.10] => {
    "install_result1": {
        "changed": false,
        "failed": false,
        "msg": "",
        "rc": 0,
        "results": [
            "httpd-2.4.6-99.el7.centos.1.x86_64 providing httpd is already installed"
        ]
    }
}

TASK [stopped_firewalld] *********************************************************
ok: [211.183.3.10]

TASK [start_httpd] ***************************************************************
changed: [211.183.3.10]

PLAY RECAP ***********************************************************************
211.183.3.10               : ok=5    changed=1    unreachable=0    failed=0    skipped=0    rescued=0    ignored=0
3. m10의 web 서버 동작 확인

실습 09 - when 모듈
문제
start-when.yml을 통해 ansible_distribution=='CentOS'이면 httpd 설치해서 동작시키고, ansible_distribution='Ubuntu'이면 nginx를 설치해서 web 서버가 잘 동작되도록 하고 접속이 잘 되는지 확인해 보세요.
풀이
1. ssh-copy-id 등록 - control_node
[root@control_node ans]# ssh-copy-id -i ~/.ssh/id_rsa.pub root@211.183.3.20
/usr/bin/ssh-copy-id: INFO: Source of key(s) to be installed: "/root/.ssh/id_rsa.pub"
/usr/bin/ssh-copy-id: INFO: attempting to log in with the new key(s), to filter out any that are already installed
/usr/bin/ssh-copy-id: INFO: 1 key(s) remain to be installed -- if you are prompted now it is to install the new keys
root@211.183.3.20's password: # test123

Number of key(s) added: 1

Now try logging into the machine, with:   "ssh 'root@211.183.3.20'"
and check to make sure that only the key(s) you wanted were added.
2. playbook 생성
[root@control_node ans]# vi start-when.yml
3. playbook 실행
[root@control_node ans]# ansible-playbook start-when.yml -i 0307.inven
- name: install_web_pb
  hosts: all
  tasks:
  - name: install_httpd
    yum:
      name: httpd
      state: present
    when: ansible_distribution == 'CentOS'
    register: install_result1

  - name: show_result1
    debug:
      var: install_result1
    when: ansible_distribution == 'CentOS'

  - name: stopped_firewalld
    service:
      name: firewalld
      state: stopped
      enabled: false
    when: ansible_distribution == 'CentOS'

  - name: start_httpd
    service:
      name: httpd
      state: started
      enabled: yes
    when: ansible_distribution == 'CentOS'

  - name: install_nginx
    apt:
      name: nginx
      state: present
    when: ansible_distribution == 'Ubuntu'
    register: install_result2

  - name: show_result2
    debug:
      var: install_result2
    when: ansible_distribution == 'Ubuntu'

  - name: start_nginx
    systemd:
      name: nginx
      state: started
      enabled: yes
    when: ansible_distribution == 'Ubuntu'
4. m10과 m20에 web 서버 동작 확인


실습 10
문제
하나의 playbook에서 CentOS면 nfs-client, Ubuntu면 nfs-server 구성
풀이
1. NFS
👉 playbook 하나로 합치기:)
1-1. playbook 생성 - os_nfs_server.yml
[root@control_node ans]# vi os_nfs_server.yml
- name: os_nfs_server_pb
  hosts: m20
  tasks:
  - name: disable_ufw
    service:
      name: ufw
      state: stopped
      enabled: no
    when: ansible_distribution == 'Ubuntu'

  - name: install_nfs-server
    apt:
      name: nfs-kernel-server
      state: present
    when: ansible_distribution == 'Ubuntu'

  - name: mkdir_/shared
    file:
      path: /nfs_shared
      state: directory
      mode: '0777'
    when: ansible_distribution == 'Ubuntu'

  - name: set_exports
    lineinfile:
      path: /etc/exports
      line: '/nfs_shared *(rw)'
      create: yes
    when: ansible_distribution == 'Ubuntu'

  - name: set exportfs
    command: exportfs -ra
    when: ansible_distribution == 'Ubuntu'

  - name: start_nfs-server
    service:
      name: nfs-kernel-server
      state: started
      enabled: yes
    when: ansible_distribution == 'Ubuntu'
1-2. playbook 실행
[root@control_node ans]# ansible-playbook os_nfs_server.yml -i 0307.inven
PLAY [os_nfs_server_pb] **********************************************************
TASK [Gathering Facts] ***********************************************************
ok: [211.183.3.20]
TASK [disable_ufw] ***************************************************************
ok: [211.183.3.20]
TASK [install_nfs-server] ********************************************************
ok: [211.183.3.20]
TASK [mkdir_/shared] *************************************************************
ok: [211.183.3.20]
TASK [set_exports] ***************************************************************
changed: [211.183.3.20]
TASK [set exportfs] **************************************************************
changed: [211.183.3.20]
TASK [start_nfs-server] **********************************************************
changed: [211.183.3.20]
PLAY RECAP ***********************************************************************
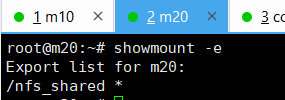
211.183.3.20 : ok=7 changed=3 unreachable=0 failed=0 skipped=0 rescued=0 ignored=01-3. 공유디렉토리 확인
2. nfs-client
2-1. playbook 생성
[root@control_node ans]# vi os_nfs_client.yml
- name: os_nfs_client_pb
  hosts: m10
  tasks:
  - name: disable_firewalld
    service:
      name: firewalld
      state: stopped
      enabled: no
    when: ansible_distribution == 'CentOS'

  - name: install_nfs-client
    yum:
      name: nfs-utils
      state: present
    when: ansible_distribution == 'CentOS'
  - name: start_nfs-client
    service:
      name: nfs-utils
      state: started
      enabled: true
    when: ansible_distribution == 'CentOS'

  - name: mkdir_/remote
    file:
      path: /remote
      state: directory
      mode: '0777'
    when: ansible_distribution == 'CentOS'

  - name: mount_nfs
    mount:
      path: /remote
      src: "211.183.3.20:/nfs_shared"
      fstype: nfs
      state: mounted
      opts: rw,sync
    when: ansible_distribution == 'CentOS'
2-2. playbook 실행
[root@control_node ans]# ansible-playbook os_nfs_client.yml -i 0307.inven

PLAY [os_nfs_client_pb] **********************************************************

TASK [Gathering Facts] ***********************************************************
ok: [211.183.3.10]

TASK [disable_firewalld] *********************************************************
ok: [211.183.3.10]

TASK [install_nfs-client] ********************************************************
ok: [211.183.3.10]

TASK [start_nfs-client] **********************************************************
ok: [211.183.3.10]

TASK [mkdir_/remote] *************************************************************
ok: [211.183.3.10]

TASK [mount_nfs] *****************************************************************
changed: [211.183.3.10]

PLAY RECAP ***********************************************************************
211.183.3.10               : ok=6    changed=1    unreachable=0    failed=0    skipped=0    rescued=0    ignored=0
2-3. nfs 테스트

실습 11 - PlayBook의 Fetch 모듈
문제
CentOS의 경우, SSH 접속기록이 /var/log/secure에 남고, Ubuntu의 경우에는 /var/log/auth.log에 남음
ssh log를 control node의 /root/log 디렉토리로 받아오는 플레이북을 만들어보세요. - fetch 모듈 사용
풀이
1. playbook 생성
[root@control_node ans]# vi fetch.yml

- name: fetch_pb
  hosts: all
  tasks:
    - name: fetch ssh log for CentOS
      fetch:
        src: /var/log/secure
        dest: /root/log/
        flat: yes
      when: ansible_distribution == 'CentOS'

    - name: fetch ssh log for Ubuntu
      fetch:
        src: /var/log/auth.log
        dest: /root/log/
        flat: yes
      when: ansible_distribution == 'Ubuntu'
2. playbook 실행
[root@control_node ans]# ansible-playbook fetch.yml -i 0307.inven

PLAY [fetch_pb] ******************************************************************

TASK [Gathering Facts] ***********************************************************
ok: [211.183.3.20]
ok: [211.183.3.10]

TASK [fetch ssh log for CentOS] **************************************************
skipping: [211.183.3.20]
changed: [211.183.3.10]

TASK [fetch ssh log for Ubuntu] **************************************************
skipping: [211.183.3.10]
changed: [211.183.3.20]

PLAY RECAP ***********************************************************************
211.183.3.10               : ok=2    changed=1    unreachable=0    failed=0    skipped=1    rescued=0    ignored=0
211.183.3.20               : ok=2    changed=1    unreachable=0    failed=0    skipped=1    rescued=0    ignored=0
3. 결과 확인

PlayBook - Handler(미래 태스크를 정의해 두고 호출[notify]해서 사용)
- 함수와 비슷
- 미리 태스크를 정의해 두고 호출(notify)해서 사용
➡️ 변경사항이 발생했을 때(changed) 트리거 됨 - 예) httpd가 설치되면 서비스 태스크 호출 ➡️ httpd 데몬 동작
1. playbook 생성
[root@control_node ans]# vi handler.yml

- name: handler_test_pb
  hosts: cent
  tasks:
  # 1) changed  ➡️ 2) 호출
  - name: install_httpd
    yum:
      name: httpd
      state: present
    notify:
    - start_handler # 밑에서 이런 이름을 갖는 handler 정의

  # handler 목록
  handlers:
  # 2) notify
  - name: start_handler
    service:
      name: httpd
      state: restarted
      enabled: yes
➕ 인벤토리 수정
[m]
211.183.3.10
211.183.3.20
[m:vars]
ansible_ssh_common_args="-o StrictHostKeyChecking=no"
[cent]
211.183.3.10
[cent:vars]
ansible_ssh_common_args="-o StrictHostKeyChecking=no"
[ubun]
211.183.3.20
[ubun:vars]
ansible_ssh_common_args="-o StrictHostKeyChecking=no"
2. playbook 실행
[root@control_node ans]# ansible-playbook handler.yml -i 0307.inven

PLAY [handler_test_pb] ***********************************************************

TASK [Gathering Facts] ***********************************************************
ok: [211.183.3.10]

TASK [install_httpd] *************************************************************
ok: [211.183.3.10] # handler 수행 ❌

PLAY RECAP ***********************************************************************
211.183.3.10               : ok=2    changed=0    unreachable=0    failed=0    skipped=0    rescued=0    ignored=0
3. m1의 httpd 삭제
[root@m10 ~]# yum remove httpd
4. playbook 재시작
[root@control_node ans]# ansible-playbook handler.yml -i 0307.inven

PLAY [handler_test_pb] ***********************************************************

TASK [Gathering Facts] ***********************************************************
ok: [211.183.3.10]

TASK [install_httpd] *************************************************************
changed: [211.183.3.10] # changed 발생 ➡️ handler 수행

RUNNING HANDLER [start_handler] **************************************************
changed: [211.183.3.10]

PLAY RECAP ***********************************************************************
211.183.3.10               : ok=3    changed=2    unreachable=0    failed=0    skipped=0    rescued=0    ignored=0
5. m10의 httpd 웹 서버 동작 확인

실습 12 - handler
문제
새로 Ubuntu 템플릿 하나 복제해서 211.183.3.30(m30)으로 만들고,
m30에서 웹 서버가 동작하고 있습니다. 해당 서버로 파일이 복사되어 index.html 파일에 변경사항이 생겼을 때, 웹 서버를 재시작시키는 playbook을 한 번 만들어보세요.
풀이
1. 서버 생성 - m30

- public key 추가
[root@control_node ans]# ssh-copy-id -i ~/.ssh/id_rsa.pub root@211.183.3.30
/usr/bin/ssh-copy-id: INFO: Source of key(s) to be installed: "/root/.ssh/id_rsa.pub"
/usr/bin/ssh-copy-id: INFO: attempting to log in with the new key(s), to filter out any that are already installed
/usr/bin/ssh-copy-id: INFO: 1 key(s) remain to be installed -- if you are prompted now it is to install the new keys
root@211.183.3.30's password:

Number of key(s) added: 1

Now try logging into the machine, with:   "ssh 'root@211.183.3.30'"
and check to make sure that only the key(s) you wanted were added.
2. playbook 생성
[root@control_node ans]# vi handler-exam.yml

- name: handler_exam_pb
  hosts: ubun
  tasks:
  - name: install_ngnix
    apt:
      name: nginx
      state: present

  - name: start_ngnix
    service:
      name: nginx
      state: restarted
      enabled: yes

  - name: copy_index
    copy:
      src: /index.html
      dest: /var/www/html/index.html
    notify:
    - restart_nginx_handler


  handlers:
  - name: restart_nginx_handler
    service:
      name: nginx
      state: restarted
3. index.html 생성
[root@control_node ans]# vi index.html

test_copy
4. playbook 실행
[root@control_node ans]# ansible-playbook handler-exam.yml -i 0307.inven

PLAY [handler_exam_pb] ***********************************************************

TASK [Gathering Facts] ***********************************************************
ok: [211.183.3.30]

TASK [install_ngnix] *************************************************************
ok: [211.183.3.30]

TASK [start_ngnix] ***************************************************************
changed: [211.183.3.30]

TASK [copy_index] ****************************************************************
changed: [211.183.3.30]

RUNNING HANDLER [restart_nginx_handler] ******************************************
changed: [211.183.3.30]

PLAY RECAP ***********************************************************************
211.183.3.30               : ok=5    changed=3    unreachable=0    failed=0    skipped=0    rescued=0    ignored=0
5. 결과 확인
- index.html이 변경됨


'CS > Linux' 카테고리의 다른 글
| [VMWare] 24-1. IaC - Ansible (1) | 2025.03.07 |
|---|---|
| [VMWare] 23-1. 서버 모니터링 - telegraf, influxdb, grafana (1) | 2025.03.05 |
| [VMware] 22-1. OpenVSwitch(OVS) (1) | 2025.02.28 |
| [VMware] 20. KVM(Kernel-based Virtual Machine) (1) | 2025.02.15 |
| [VMware] 19-1. VPN - Site to Site VPN (0) | 2025.02.14 |


