
| 일 | 월 | 화 | 수 | 목 | 금 | 토 |
|---|---|---|---|---|---|---|
| 1 | 2 | 3 | 4 | 5 | ||
| 6 | 7 | 8 | 9 | 10 | 11 | 12 |
| 13 | 14 | 15 | 16 | 17 | 18 | 19 |
| 20 | 21 | 22 | 23 | 24 | 25 | 26 |
| 27 | 28 | 29 | 30 | 31 |
- NLB
- linux
- vmware
- GNS3
- 3 TIER
- IAM
- ALB
- aws cloud shcool 8
- aws cloud school
- FTP
- DNS
- aws SAA-c03
- EC2 인스턴스
- Kubernetes
- AWS
- eks
- tftp
- EC2
- NAT
- Troubleshooting
- aws cloud
- aws cloud school 8
- 네트워크
- vyos
- SAA-C03
- AWS 자격증
- Ebs
- Firewall
- docker
- aws saa
- Today
- Total
나의 공부기록
[VMWare] 24-1. IaC - Ansible 본문
DevOps ( = IaC + CI/CD )
- IaC(Infrastructure as Code)
- 인프라를 코드로 정의
- AMI와 비슷하지만 좀 더 자세하게 코드로 작성해 놓는 느낌
IaC 도구
1. Ansible
- "이미 구축된" 인프라를 "관리" 특화
- 예시) virt-builder를 통해 KVM 이미지를 커스터마이징 ➡️ 100개의 서버 생성
👉100개의 서버를 한 번에 관리 - Python으로 구성된 언어
2. Terraform
- "클라우드 인프라 구축" 특화
- 언어
IaC 장점
- 인프라를 On-demand로 빠르게 띄울 수 있음
- 휴먼 에러를 줄일 수 있음⬇️
- 동일한 환경을 재현 가능(=immutable, 불변)
IaC 특징
- 멱등성 성립(=여러 번 수행해도 같은 결과가 나옴)
- 예시) httpd 데몬이 설치되어 있으면 좋겠음(= 바람, Desired)
➡️ 설치가 안 되어 있다면 설치 / 이미 설치가 되어 있으면 설치 ❌
- 예시) httpd 데몬이 설치되어 있으면 좋겠음(= 바람, Desired)
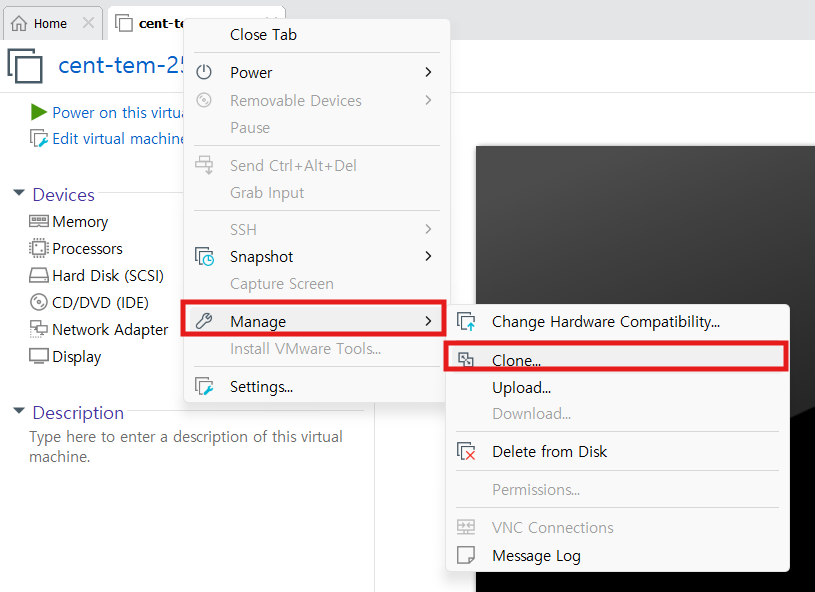
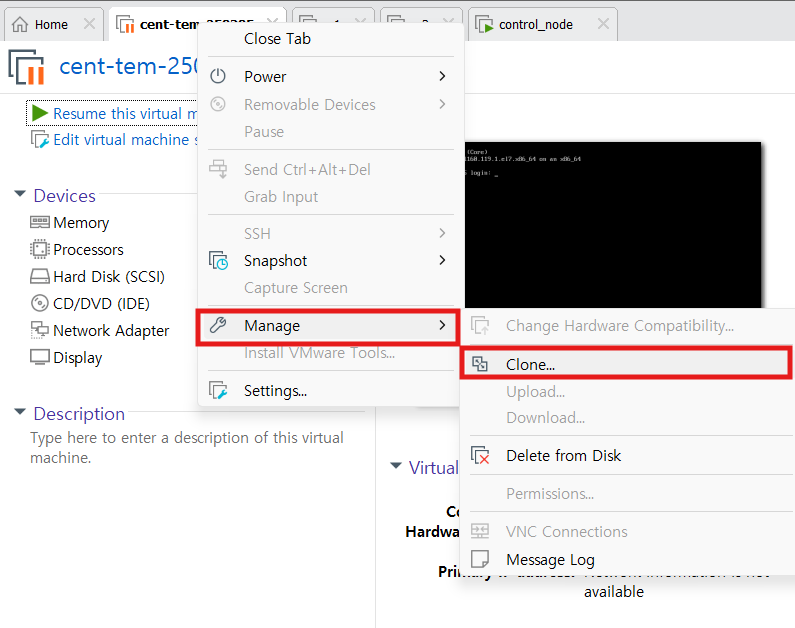
✅앞으로 VM 템플릿을 복제(clone)해서 사용할 예정!
VM 템플릿 생성
1. template 서버 생성 - cent-tem
- Spec
- 2core, 2GB, 20GB
- IP : 211.183.3.100/24

- 방화벽 해제
[root@cent-tem-250305 ~]# systemctl stop firewalld
[root@cent-tem-250305 ~]# systemctl disable firewalld
Removed symlink /etc/systemd/system/multi-user.target.wants/firewalld.service.
Removed symlink /etc/systemd/system/dbus-org.fedoraproject.FirewallD1.service.- SELinux 비활성화
[root@cent-tem-250305 ~]# sed -i s/SELINUX=enforcing/SELINUX=disabled/g /etc/selinux/config- 레포지토리 수정
[root@cent-tem-250305 ~]# cat <<EOF > /etc/yum.repos.d/CentOS-Base.repo
> [base]
> name=CentOS-$releasever - Base
>#mirrorlist=http://mirrorlist.centos.org/?release=$releasever&arch=$basearch&repo=os&infra=$infra
> baseurl=https://vault.centos.org/7.9.2009/os/x86_64/
> gpgcheck=1
> gpgkey=file:///etc/pki/rpm-gpg/RPM-GPG-KEY-CentOS-7
>
>#released updates
> [updates]
> name=CentOS-$releasever - Updates
>#mirrorlist=http://mirrorlist.centos.org/?release=$releasever&arch=$basearch&repo=updates&infra=$infra
> baseurl=https://vault.centos.org/7.9.2009/updates/x86_64/
> gpgcheck=1
> gpgkey=file:///etc/pki/rpm-gpg/RPM-GPG-KEY-CentOS-7
>
>#additional packages that may be useful
> [extras]
> name=CentOS-$releasever - Extras
>#mirrorlist=http://mirrorlist.centos.org/?release=$releasever&arch=$basearch&repo=extras&infra=$infra
> baseurl=https://vault.centos.org/7.9.2009/extras/x86_64/
> gpgcheck=1
> gpgkey=file:///etc/pki/rpm-gpg/RPM-GPG-KEY-CentOS-7
>
>#additional packages that extend functionality of existing packages
> [centosplus]
> name=CentOS-$releasever - Plus
>#mirrorlist=http://mirrorlist.centos.org/?release=$releasever&arch=$basearch&repo=centosplus&infra=$infra
> baseurl=https://vault.centos.org/7.9.2009/centosplus/x86_64/
> gpgcheck=1
> enabled=0
> gpgkey=file:///etc/pki/rpm-gpg/RPM-GPG-KEY-CentOS-7
>
>#contrib - packages by Centos Users
> [contrib]
> name=CentOS-$releasever - Contrib
>#mirrorlist=http://mirrorlist.centos.org/?release=$releasever&arch=$basearch&repo=contrib&infra=$infra
> baseurl=https://vault.centos.org/7.9.2009/contrib/x86_64/
> gpgcheck=1
> enabled=0
> gpgkey=file:///etc/pki/rpm-gpg/RPM-GPG-KEY-CentOS-7
> EOF- yum update
[root@cent-tem-250305 ~]# yum -y update- NetworkManger 해제
[root@cent-tem-250305 ~]# systemctl stop NetworkManager
[root@cent-tem-250305 ~]# systemctl disable NetworkManager
Removed symlink /etc/systemd/system/multi-user.target.wants/NetworkManager.service.
Removed symlink /etc/systemd/system/dbus-org.freedesktop.nm-dispatcher.service.
Removed symlink /etc/systemd/system/network-online.target.wants/NetworkManager-wait-online.service.- epel-release 패키지 설치
[root@control_node ~]# yum install -y epel-release
2. 서버 Shutdown

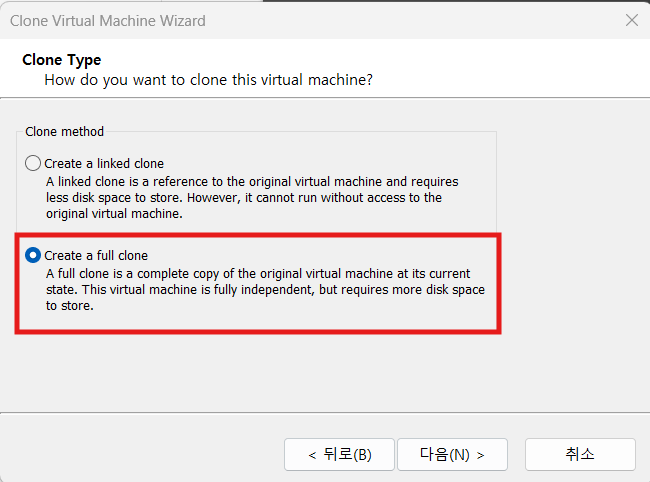
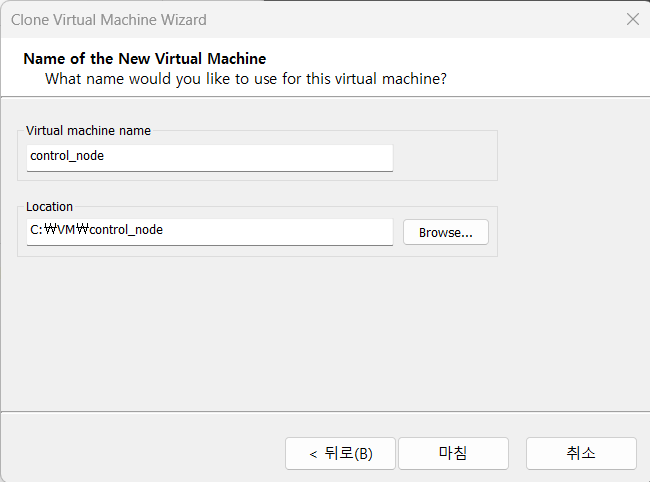
3. 서버 clone - m1, m2, control_node


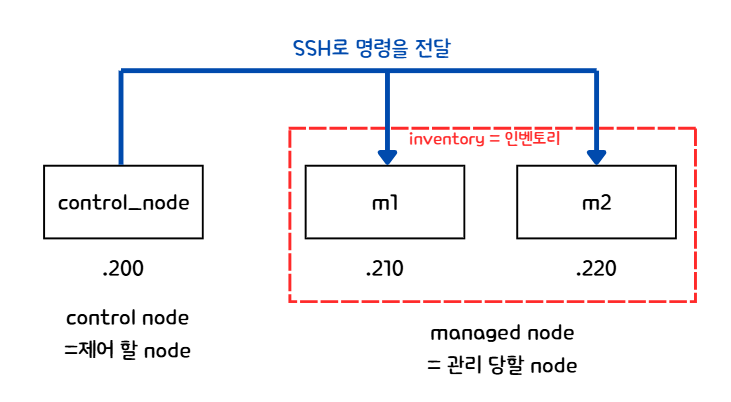
- control_node : m1, m2 노드에 명령을 내려 관리할 예정
- Ansible은 server-client 구조는 아님
- 역할이 딱 정해져있는 것이 아니라, managed node들에게 ssh로 Ansible 명령만 전달(=KeyPair 존재)할 수 있으면 어디가 됐던 control node가 될 수 있음
- 템플릿에 ssh의 public key를 넣어줘야 함
- contorl_node(=서버같은 것) - private key / managed_node - pulbic key
Ansible 노드 구성
- inventory에 존재하는 node들은 ansible이나 다른 환경 세팅이 필요하지 않음
➡️ 단, control_node는 ansible 및 환경 세팅이 필요❗
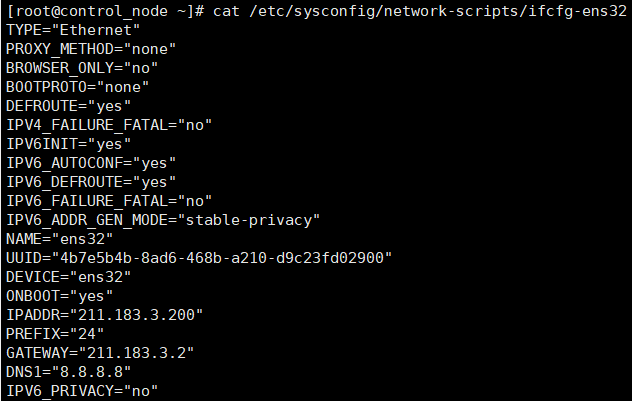
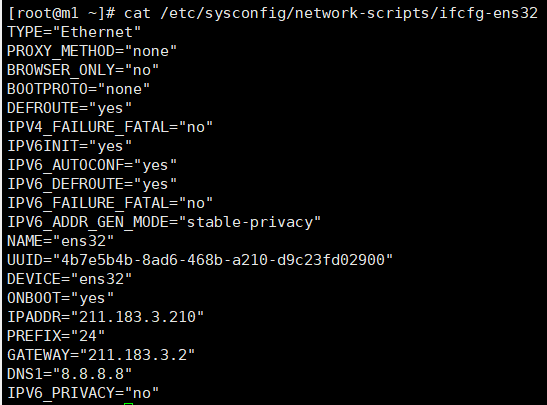
4. 각 서버 IP 변경 및 hostname 수정 - control_node, m1, m2
- IP가 같기 때문에, 하나씩 켜서 수정해야 충돌이 안남
✅네트워크 설정
- /etc/sysconfig/network-sciprts/ifcfg-ens32 수정
- template을 만들면 UUID나 Mac 주소 등 공유해야 하는 값들이자동으로 변경되지 않기때문에충돌이 발생했지만,clone은고유해야하는 값들을 자동으로 변경해주기 때문에 네트워크 수정을 할 필요가 없음❌
- IP 변경

- hostname 수정
[root@cent-tem-250305 ~]# hostnamectl set-hostname control_node
[root@cent-tem-250305 ~]# hostnamectl set-hostname m1
[root@cent-tem-250305 ~]# hostnamectl set-hostname m2- control_node와 m1,m2 통신 확인


5. ansible 설치 - control_node
- ansible 패키지 설치
- python 관련 모듈 설치 ➡️ python으로 구성되어 있기 때문
[root@control_node ~]# yum install -y ansible- ansible 버전 확인
[root@control_node ~]# ansible --version
ansible 2.9.27
  config file = /etc/ansible/ansible.cfg
  configured module search path = [u'/root/.ansible/plugins/modules', u'/usr/share/ansible/plugins/modules']
  ansible python module location = /usr/lib/python2.7/site-packages/ansible
  executable location = /usr/bin/ansible
python version = 2.7.5 (default, Nov 14 2023, 16:14:06) [GCC 4.8.5 20150623 (Red Hat 4.8.5-44)]- inventory에 m1,m2 추가
- 기본 inventory 파일 : /etc/ansible/hosts
- 기본 inventory 말고 따로 생성해도 괜찮음
[root@control_node ~]# vi /etc/ansible/hosts

# 두 대의 관리당할 서버를 추가
# 카테고리로 묶지 않았음
# 중복해서 카테고리를 묶어도 상관없음
[추가 내용]
211.183.3.210
211.183.3.220

# 기본적으로 제공되는 서식을 참고하여 활용 가능
## [webservers]
## alpha.example.org
## beta.example.org
## 192.168.1.100
## 192.168.1.110
💡Ansible에서의 모듈은 리눅스의 모듈과 다르고, SSH를 통해 전달되는 형태
Ping 모듈
6. 인벤토리에 속한 서버에 ansible 명령 전달 - control_node
6-1. 인벤토리 서버에 ping 테스트
- ping : 연결성을 테스트하는 모듈
➡️ icmp 패킷을 보내는 프로토콜이 아니라 ping이라는 요청에 대한 pong을 반환하는 모듈
# all : (기본) inventory에 존재하는 모든 서버에
# -m(module) : 도구 -> ping(모듈명)이라는 도구를 사용
[root@control_node ~]# ansible all -m ping

# ssh self 경고
The authenticity of host '211.183.3.210 (211.183.3.210)' can't be established.
ECDSA key fingerprint is SHA256:HilRlqpqvkreg6mA4byXGDwWZQ8JFG58M6RHSV6/hq0.
ECDSA key fingerprint is MD5:f7:70:7a:fe:00:ab:ad:aa:3d:e0:75:38:ad:fa:b6:53.
Are you sure you want to continue connecting (yes/no)? The authenticity of host '211.183.3.220 (211.183.3.220)' can't be established.
ECDSA key fingerprint is SHA256:HilRlqpqvkreg6mA4byXGDwWZQ8JFG58M6RHSV6/hq0.
ECDSA key fingerprint is MD5:f7:70:7a:fe:00:ab:ad:aa:3d:e0:75:38:ad:fa:b6:53.
Are you sure you want to continue connecting (yes/no)? yes # 서버 대수만큼 쳐야함- 인증 권한 없음 ➡️ SSH 접속 성립 ❌
- 인증 불가능 ➡️ 퍼블릭키(Key Pair) & 암호 설정 ❌ 때문에
- Key Pair
- control_node(=ssh client) : private key / m1&m2(=ssh server) : public key
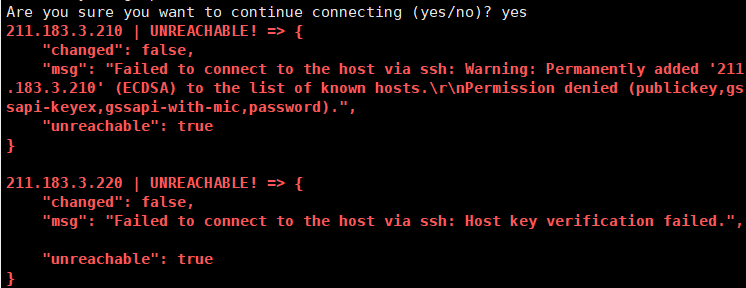
- changed = 변화 여부
- msg = 응답
- unreachable = 접근가능 여부(불가능)
6-2. 암호로 인증하여 SSH 접속
- 상대 노드와 연결 성공시, "pong"을 반환
# -k, --ask-pass : password로 인증
[root@control_node ~]# ansible all -m ping -k
SSH password: # test123
211.183.3.210 | SUCCESS => {
    "ansible_facts": {
        "discovered_interpreter_python": "/usr/bin/python"
    },
    "changed": false,
    "ping": "pong"
}
211.183.3.220 | SUCCESS => {
    "ansible_facts": {
        "discovered_interpreter_python": "/usr/bin/python"
    },
    "changed": false,
    "ping": "pong"
}

Yum 모듈
7. yum 모듈 - control_node
7-1. 인벤토리 수정
[root@control_node ~]# vi /etc/ansible/hosts

[ 수정 내용 ]
211.183.3.210
211.183.3.220

[m1]
211.183.3.210
[m2]
211.183.3.220
7-2. yum 모듈 실행
- 해당하는 모듈을 실행할 때, 필요한 인자를 전달 가능
# Desired
# ➡️ m1(기본 inventory의 [m1])에 yum 모듈을 실행할 때, httpd 패키지(name)가 존재(state)하면 좋겠어
# 암호로 인증(-k)할 예정
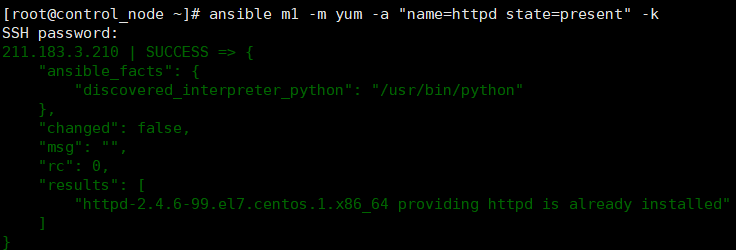
[root@control_node ~]# ansible m1 -m yum -a "name=httpd state=present" -k
SSH password:
211.183.3.210 | CHANGED => {
"ansible_facts": {
"discovered_interpreter_python": "/usr/bin/python"
},
"changed": true,
"changes": {
"installed": [
"httpd"
]
},- 반한된 결과의 색이 노란색 ➡️ 변화됨(=반영)
- 내가 원하는 상태(state)가 존재하는(present) 상태였기 때문에, httpd라는 패키지가 설치 안된 서버에 설치가 됨

- m1 노드에 httpd가 설치된 것을 확인 가능

💡 Desired(=멱등성) VS 명령어 반복 수행 차이점
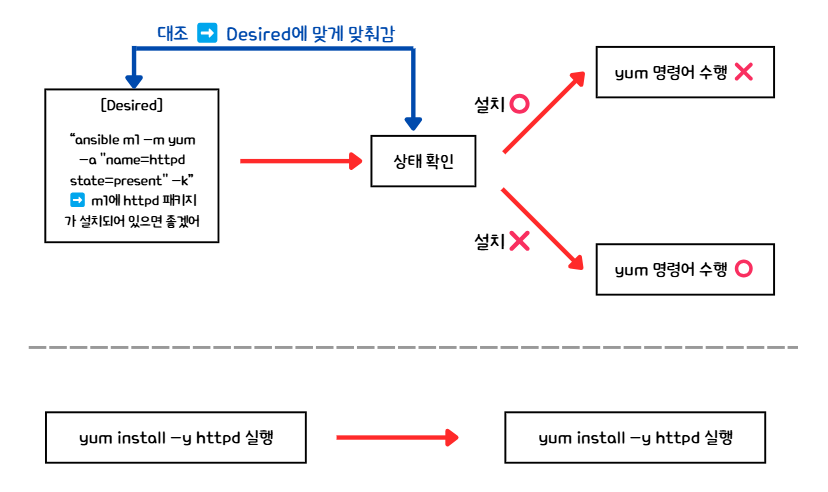
- 바램(Desired state, 원하는 상태)와 현재 상태(status)를 대조해서 '현재상태'가 '바램'에 수렴하도록 함
- 명령어를 반복 수행하는 것과는 차이가 있음
- 명령어를 한 번 더 실행하면 결과가 초록색 ➡️ 변경된 내용이 없음
- 이미 설치가 되어있기 때문에 ➡️ 멱등성(IaC 특징)
👉 이미 설치가 되어있는 상태이기 때문에 httpd를 설치하는 명령어가 수행되지 않음
- 이미 설치가 되어있기 때문에 ➡️ 멱등성(IaC 특징)
Service 모듈 - Systemctl과 비슷
8. service 모듈 실행
8-1. service 모듈 실행
# -m service(모듈) = systemctl 비슷
# state = started ➡️ 시작이 완료된 상태였으면 좋겠음
[root@control_node ~]# ansible 211.183.3.210 -m service -a "name=httpd state=started" -k
8-2. 명령 결과 확인
- 명령어 실행 결과
- ansible_facts를 통해 상태를 받아오기 때문에
➡️ 상태를 받기 싫으면 ansible_facts를 비활성화하면 됨
- ansible_facts를 통해 상태를 받아오기 때문에
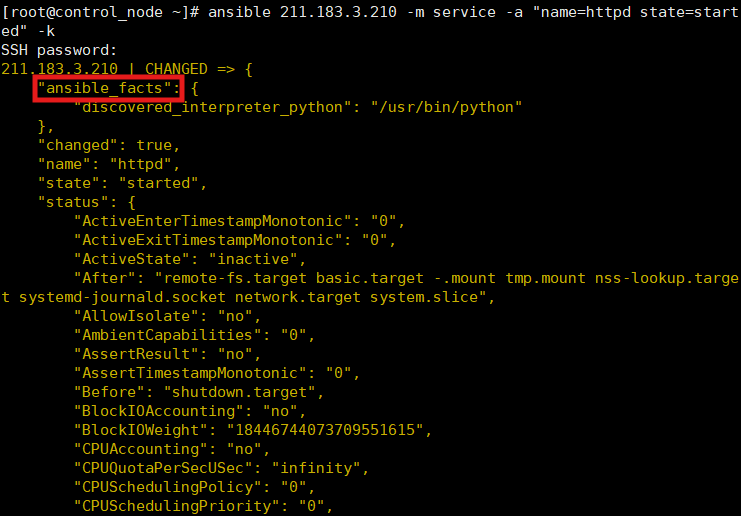
- m1의 httpd 패키지 상태 확인
➡️잘 적용된 것을 확인 가능

- 오타가 발생하면 사용가능한 상태를 보여줌

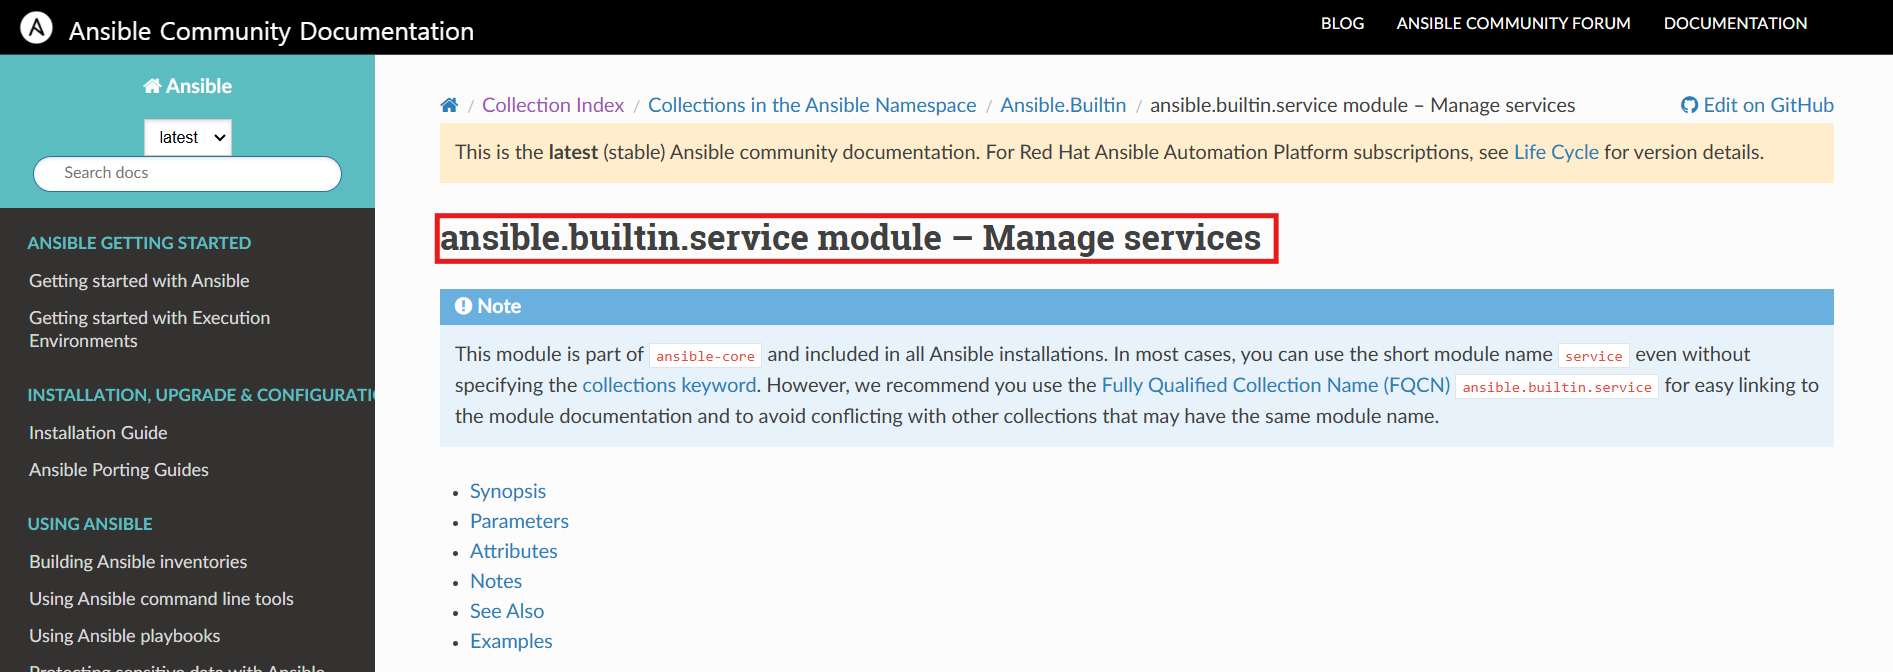
✅ ansible 모듈 확인 방법
- ansible 모듈 공신 문서 제공 - https://docs.ansible.com/ansible/2.8/modules/list_of_all_modules.html
Ansible collections | Ansible Documentation
Ansible collections Collections are a distribution format for Ansible content that can include playbooks, roles, modules, and plugins.
docs.ansible.com
- ansible을 통해서 인프라를 구성할 수 있지만, 각 IaC 툴마다 특화된 것이 있기 때문에 비효율적

실습 01 - service 모듈의 enabled 속성
문제
m2에 httpd라는 데몬이 잘 동작하고, 재부팅 후에도 동작할 수 있도록 ansible 명령을 수행해 보세요.
httpd state : started & enable
풀이
1. ansible 모듈 공식 문서로 enable 하는 방법 검색

2. ansible을 통해 m2에 httpd 설치
[root@control_node ~]# ansible m2 -m yum -a "name=httpd state=present" -k
SSH password:
211.183.3.220 | CHANGED => {
    "ansible_facts": {
        "discovered_interpreter_python": "/usr/bin/python"
    },
    "changed": true,
    "changes": {
        "installed": [
            "httpd"
        ]
},- m2에 httpd 패키지 설치 확인

3. ansible을 통해 m2에 httpd가 재부팅되어도 동작할 수 있도록 설정
[root@control_node ~]# ansible m2 -m service -a "name=httpd state=started enabled=yes" -k
SSH password:
211.183.3.220 | CHANGED => {
    "ansible_facts": {
        "discovered_interpreter_python": "/usr/bin/python"
    },
    "changed": true,
    "enabled": true,
    "name": "httpd",
"state": "started",- m2 재부팅 후, httpd 패키지가 동작하는지 확인

실습 02 - service 모듈로 방화벽 활성화
문제
ansible로 m2의 방화벽을 켜보세요.
풀이
1. m2의 httpd에 접속 가능 확인

2. m2의 방화벽 활성화
[root@control_node ~]# ansible m2 -m service -a "name=firewalld state=started" -k
3. m2에 curl로 httpd에 접속하면 접속 불가 확인 가능

user 모듈 - 사용자 생성
1. m1의 user( newuser1 ) 생성
[root@control_node ~]# ansible m1 -m user -a "name=newuser1" -k
SSH password:
211.183.3.210 | CHANGED => {
    "ansible_facts": {
        "discovered_interpreter_python": "/usr/bin/python"
    },
    "changed": true,
    "comment": "",
    "create_home": true,
    "group": 1001,
    "home": "/home/newuser1",
    "name": "newuser1",
    "shell": "/bin/bash",
    "state": "present",
    "system": false,
    "uid": 1001
}
2. m1 서버에서 사용자 확인

실습 03 - inventory의 카테고리 추가
문제
m3 서버를 한 대 추가해서, m1, m2는 seoul 서버로 묶고, m3 서버는 busan 서버로 묶어보세요.
➡️ inventory [seoul] 211.183.3.210 & 211.183.3.220 [busan] 211.183.3.230
풀이
1. m3 서버 추가 - clone
- IP : 211.183.3.230/24
- IP 수정

2. inventory 추가 - control_node
[root@control_node ~]# vi /etc/ansible/hosts

211.183.3.210
211.183.3.220

[m1]
211.183.3.210
[m2]
211.183.3.220

[seoul]
211.183.3.210
211.183.3.220
[busan]
211.183.3.230
Ansible - 임의로 만든 inventory 파일 지정
1. inventory 파일 생성
[root@control_node ~]# vi myinven

[추가 내용]
[seoul]
211.183.3.210
211.183.3.220
[busan]
211.183.3.230
2. ansible 명령
- -i 옵션을 통해 inventory 파일 지정
# -k 없이 실행 ➡️ yes 입력
[root@control_node ~]# ansible busan -i myinven -m service -a "name=firewalld state=started"
The authenticity of host '211.183.3.230 (211.183.3.230)' can't be established.
ECDSA key fingerprint is SHA256:HilRlqpqvkreg6mA4byXGDwWZQ8JFG58M6RHSV6/hq0.
ECDSA key fingerprint is MD5:f7:70:7a:fe:00:ab:ad:aa:3d:e0:75:38:ad:fa:b6:53.
Are you sure you want to continue connecting (yes/no)? yes
211.183.3.230 | UNREACHABLE! => {
    "changed": false,
    "msg": "Failed to connect to the host via ssh: Warning: Permanently added '211.183.3.230' (ECDSA) to the list of known hosts.\r\nPermission denied (publickey,gssapi-keyex,gssapi-with-mic,password).",
    "unreachable": true
}

# -k 있이 실행 ➡️ 비밀번호 작성
[root@control_node ~]# ansible busan -i myinven -m service -a "name=firewalld state=started" -k
SSH password:
211.183.3.230 | UNREACHABLE! => {
    "changed": false,
    "msg": "Invalid/incorrect password: Permission denied, please try again.",
    "unreachable": true
}
SSH 인증 - KeyPair 사용(public key)
1. KeyPair 생성
- 사실상 ssh-keygen만 작성하는 것과 다르지 않지만
➡️ 옵션을 지정해줬기 때문에 enter(default값 지정할)를 칠 필요가 없음
# -b : 2048 비트 지정 / -t : 암호화 방식 rsa
# -f : 파일 저장 디렉토리 지정 / -q : (뒤에 작성하지 않아서) message 남기지 않음
# -N "" : PassPhrase = 프라이빗키 암호 = 암호 X
[root@control_node ~]# ssh-keygen -b 2048 -t rsa -f ~/.ssh/id_rsa -q -N ""- KeyPair 생성 확인
- 해당 id_rsa.pub을 managed node들에 심어줄 예정

2. 생성한 manged node에 public key 등록 - m1, m2, m3
# m1에 id_rsa.pub을 넣어줌
# -i : 인증 & public key 넣어줌
[root@control_node ~]# ssh-copy-id -i ~/.ssh/id_rsa.pub root@211.183.3.210
/usr/bin/ssh-copy-id: INFO: Source of key(s) to be installed: "/root/.ssh/id_rsa.pub"
/usr/bin/ssh-copy-id: INFO: attempting to log in with the new key(s), to filter out any that are already installed
/usr/bin/ssh-copy-id: INFO: 1 key(s) remain to be installed -- if you are prompted now it is to install the new keys
root@211.183.3.210's password: #test123

Number of key(s) added: 1

Now try logging into the machine, with:   "ssh 'root@211.183.3.210'"
and check to make sure that only the key(s) you wanted were added.
- m1에서 id_rsa.pub전달 확인
- 대상 서버에 public key를 등록하면 authorized_keys 파일에 저장됨

3. SSH KeyPair 인증 확인 - 암호 인증 불필요
- Public Key를 managed node들에 넣어줬기 때문에 SSH 암호 인증이 불필요함을 확인

Play Book(플레이북)
- 태스크를 모아놓은 명세표(문서)
- 모듈(=도구) / 태스크(=작업) / 인벤토리(managed nodes list) 등을 모아둔 것
- 예) 모듈 = 장도리 = 도구 / 태스크 = 못 박기, 못 뽑기
- 예) 내가 수행하고자 하는 작업(task) = httpd라는 패키지가 설치되었으면 좋겠음
➡️ yum이라는 도구를 사용해서 state를 present로 만들면 됨 - 예) 내가 수행하고자 하는 작업(task) = httpd라는 패키지가 없으면 좋겠음
➡️ yum이라는 도구를 사용하여 state를 absent로 만들면 됨
PlayBook 구성 과정
1. playbook 저장 경로 생성
[root@control_node ~]# mkdir /ans
[root@control_node ~]# cd /ans/
[root@control_node ans]# pwd
/ans
💡 yaml 파일
- yaml 파일의 확장자 : .yaml 또는 .yml
➡️ JSON파일과 호환 = <key>:<value> 형태로 구성된 파일 - 파이썬의 자료형 중 리스트와 딕셔너리를 통해 구성되어 있음
- 리스트 : 동물 = ["cat", "dog"]
- 딕셔너리 : 서버 = {"cpu":2, "ram" :2048"}
2. playbook 생성
- 수행할 task가 없는 playbook 생성
[root@control_node ans]# vi playbook.yml

[추가 내용]
# :를 기준으로 key : value ➡️ 딕셔너리
- name: playbook-name # - : 리스트의 요소들('cat', 'dog' 등...)
  hosts: all
  tasks: # 작업을 명시하지 않았기 때문에, 아무런 작업도 수행하지 않음
3. 기본 inventory에 playbook 적용
# 기본 inventory의 모든 서버들한테 playbook.yml이라는 playbook을 수행
[root@control_node ans]# ansible-playbook playbook.yml

PLAY [playbook-name] *************************************************************

TASK [Gathering Facts] ***********************************************************
ok: [211.183.3.230]
ok: [211.183.3.210]
ok: [211.183.3.220]

# ok=1 ➡️ 수행이 잘 되었음
# changed=0 ➡️ 변화된 것 없음
PLAY RECAP ***********************************************************************
211.183.3.210              : ok=1    changed=0    unreachable=0    failed=0    skipped=0    rescued=0    ignored=0
211.183.3.220              : ok=1    changed=0    unreachable=0    failed=0    skipped=0    rescued=0    ignored=0
211.183.3.230              : ok=1    changed=0    unreachable=0    failed=0    skipped=0    rescued=0    ignored=0

# 인벤토리 지정 방법
[root@control_node ans]# cp ~/myinven .
[root@control_node ans]# ls
myinven  playbook.yml
[root@control_node ans]# ansible-playbook playbook.yml -i myinven
4. Task 추가
[root@control_node ans]# vi playbook.yml

[추가 내용]
# 2칸 들여쓰기 적용
- name: playbook-name
  hosts: all
  tasks:
  # task(작업)
  # 들여쓰기 같으면 같은 레벨 ➡️ name & yum 같은 레벨, name & state는 yum의 하위 요소
  - name: install_httpd # httpd 패키지 설치하는 task
    yum: # 모듈
      name: httpd # 패키지명
      state: present # 상태
5. Task가 추가된 playbook 실행
[root@control_node ans]# ansible-playbook playbook.yml -i myinven

PLAY [playbook-name] *************************************************************

TASK [Gathering Facts] ***********************************************************
ok: [211.183.3.210]
ok: [211.183.3.220]
ok: [211.183.3.230]

TASK [install_httpd] *************************************************************
ok: [211.183.3.210]
ok: [211.183.3.220]
changed: [211.183.3.230]

# m1과 m2에는 httpd가 이미 설치되어 있기 때문에, 변화가 없음
PLAY RECAP ***********************************************************************
211.183.3.210              : ok=2    changed=0    unreachable=0    failed=0    skipped=0    rescued=0    ignored=0
211.183.3.220              : ok=2    changed=0    unreachable=0    failed=0    skipped=0    rescued=0    ignored=0
211.183.3.230              : ok=2    changed=1    unreachable=0    failed=0    skipped=0    rescued=0    ignored=0
실습 04 - PlayBook 패키지 설치(install)
문제
nginx.yml이라는 플레이북을 만들어서 busan 서버에 nginx를 설치하고 동작시켜서 접속이 잘 되는 것까지 확인
풀이
💡Point
- busan 서버에 httpd 데몬이 동작하고 있으므로
➡️ httpd를 삭제 또는 비활성화 한 후, epel-relase와 nginx 설치 & 활성화, 방화벽 해제
1. playbook 생성 - nginx.yml
[root@control_node ans]# vi nginx.yml

# 내가 작성한 거
- name: nginx-playbook
  hosts: busan
  tasks:
  - name: absetn_httpd
    yum:
      name: httpd
      state: absent
  - name: install_epel-release
    yum:
      name: epel-release
      state: latest
  - name: install_nginx
    yum:
      name: nginx
      state: present
  - name: start_enable_nginx
    service:
      name: nginx
      state: started
      enabled: yes
  - name: disable_firewalld
    service:
      name: firewalld
      state: stopped

# 강사님이 작성해주신 거
- name: nginx-pb
  hosts: busan
  tasks:
  - name: remove_httpd
    yum:
      name: httpd
      state: removed

  - name: firewalld_stopped
    service:
      name: firewalld
      state: stopped
      enabled: false # systemctl disable firewalld

  - name: install_epel
    yum:
      name: epel-release
      state: present

  - name: install_nginx
    yum:
      name: nginx
      state: present

  - name: start_nginx
    service:
      name: nginx
      state: started
      enabled: true
2. ansible 적용
[root@control_node ans]# ansible-playbook nginx.yml -i myinven

PLAY [nginx-playbook] ************************************************************

TASK [Gathering Facts] ***********************************************************
ok: [211.183.3.230]

TASK [absetn_httpd] **************************************************************
ok: [211.183.3.230]

TASK [install_epel-release] ******************************************************
ok: [211.183.3.230]

TASK [install_nginx] *************************************************************
ok: [211.183.3.230]

TASK [start_enable_nginx] ********************************************************
ok: [211.183.3.230]

TASK [disable_firewalld] *********************************************************
changed: [211.183.3.230]

PLAY RECAP ***********************************************************************
211.183.3.230              : ok=6    changed=1    unreachable=0    failed=0    skipped=0    rescued=0    ignored=0
3. nginx 접속 확인
Playbook - install(여러 개의 패키지 설치)
1. yaml 파일 생성
[root@control_node ans]# vi multi.yml

- name: multi_install_pb
  hosts: busan
  tasks:
  - name: multi_install_task
    yum:
      name: "{{ item }}" # item을 변수처럼 사용해서 반복해서 사용할 수 있도록
      state: present
    with_items: # items에 들어가는 값들 정의
    - "httpd"
    - "net-tools"
    - "wget"

# item 변수 말고, 딕셔너리로 지정하는 방법도 존재
- name: copy_index_pb
  hosts: seoul
  tasks:
  - name: install_nginx
    yum:
      name: ['epel-release','nginx']
      state: present
  - name: start_nginx
    service:
      name: nginx
      state: started
      enabled: true

  - name: copy_file_task
    copy:
      src: /ans/index.html
      dest: /usr/share/nginx/html/index.html
2. playbook 실행
[root@control_node ans]# ansible-playbook multi.yml -i myinven

PLAY [multi_install_pb] **********************************************************

TASK [Gathering Facts] ***********************************************************
ok: [211.183.3.230]

TASK [multi_install_task] ********************************************************
[DEPRECATION WARNING]: Invoking "yum" only once while using a loop via
squash_actions is deprecated. Instead of using a loop to supply multiple items
and specifying `name: "{{ item }}"`, please use `name: ['httpd', 'net-tools',
'wget']` and remove the loop. This feature will be removed in version 2.11.
Deprecation warnings can be disabled by setting deprecation_warnings=False in
ansible.cfg.
changed: [211.183.3.230] => (item=[u'httpd', u'net-tools', u'wget'])

PLAY RECAP ***********************************************************************
211.183.3.230              : ok=2    changed=1    unreachable=0    failed=0    skipped=0    rescued=0    ignored=0
3. busan - m3 서버에 net-tools 설치 확인
- 경고가 뜨기는 했지만 잘 설치됨

Playbook - copy( 파일 복사 : control_node ➡️ managed_nodes )
- managed_nodes ➡️ control_node로도 가능
1. 테스트 파일 생성
[root@control_node ans]# echo test_copy > index.html
[root@control_node ans]# ls
index.html  multi.yml  myinven  nginx.yml  playbook.yml
2. playbook 생성 - copy.yml
[root@control_node ans]# vi copy.yml

- name: copy_index_playbook
  hosts: seoul
  tasks:
  - name: copy_file_task
    copy:
      src: /ans/index.html # source path
      dest: /var/www/html/index.html # destination path
3. copy.yml playbook 실행
[root@control_node ans]# ansible-playbook copy.yml -i myinven

PLAY [copy_index_playbook] *******************************************************

TASK [Gathering Facts] ***********************************************************
ok: [211.183.3.210]
ok: [211.183.3.220]

TASK [copy_file_task] ************************************************************
changed: [211.183.3.210]
changed: [211.183.3.220]

PLAY RECAP ***********************************************************************
211.183.3.210              : ok=2    changed=1    unreachable=0    failed=0    skipped=0    rescued=0    ignored=0
211.183.3.220              : ok=2    changed=1    unreachable=0    failed=0    skipped=0    rescued=0    ignored=0
4. index.html 파일 복사된 것을 확인 가능

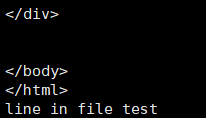
Playbook - lineinfile(파일에 내용 추가)
1. playbook 생성
[root@control_node ans]# vi lineinfile.yml

- name: lineinfile_pb
  hosts: busan
  tasks:
  - name: lineinfile
    lineinfile:
      path: /usr/share/nginx/html/index.html
      line: "line in file test"
2. playbook 실행
[root@control_node ans]# vi lineinfile.yml
[root@control_node ans]# ansible-playbook lineinfile.yml -i myinven

PLAY [lineinfile_pb] *************************************************************

TASK [Gathering Facts] ***********************************************************
ok: [211.183.3.230]

TASK [lineinfile] ****************************************************************
changed: [211.183.3.230]

PLAY RECAP ***********************************************************************
211.183.3.230              : ok=2    changed=1    unreachable=0    failed=0    skipped=0    rescued=0    ignored=0
3. 결과 확인 - m3 index.html 내용 추가 확인

4. m3의 index.html 파일 삭제
[root@cent-tem-250305 ~]# rm /usr/share/nginx/html/index.html
rm: remove symbolic link ‘/usr/share/nginx/html/index.html’? yes
5. playbook 수정
[root@control_node ans]# vi lineinfile.yml

- name: lineinfile_pb
  hosts: busan
  tasks:
  - name: lineinfile
    lineinfile:
      path: /usr/share/nginx/html/index.html
      line: "line in file test"
      create: true # 내용 추가
6. playbook 실행
[root@control_node ans]# ansible-playbook lineinfile.yml -i myinven

PLAY [lineinfile_pb] *************************************************************

TASK [Gathering Facts] ***********************************************************
ok: [211.183.3.230]

TASK [lineinfile] ****************************************************************
changed: [211.183.3.230]

PLAY RECAP ***********************************************************************
211.183.3.230              : ok=2    changed=1    unreachable=0    failed=0    skipped=0    rescued=0    ignored=0
7. index.html 파일 생성된 것 확인 가능

Playbook - file(파일 생성 및 권한 부여)
1. yml파일 생성
[root@control_node ans]# vi file.yml

- name: make_file_pb
  hosts: busan
  tasks:
  - name: make_file_task
    file:
      path: /touch-test.txt
      state: touch
      mode: '0777' # 777앞의 0은 8진수를 의미 /  권한 부여
2. playbook 실행
[root@control_node ans]# ansible-playbook file.yml -i myinven

PLAY [make_file_pb] **************************************************************

TASK [Gathering Facts] ***********************************************************
ok: [211.183.3.230]

TASK [make_file_task] ************************************************************
changed: [211.183.3.230]

PLAY RECAP ***********************************************************************
211.183.3.230              : ok=2    changed=1    unreachable=0    failed=0    skipped=0    rescued=0    ignored=0
3. 파일 생성 및 권한 부여 확인 - m3(busan)

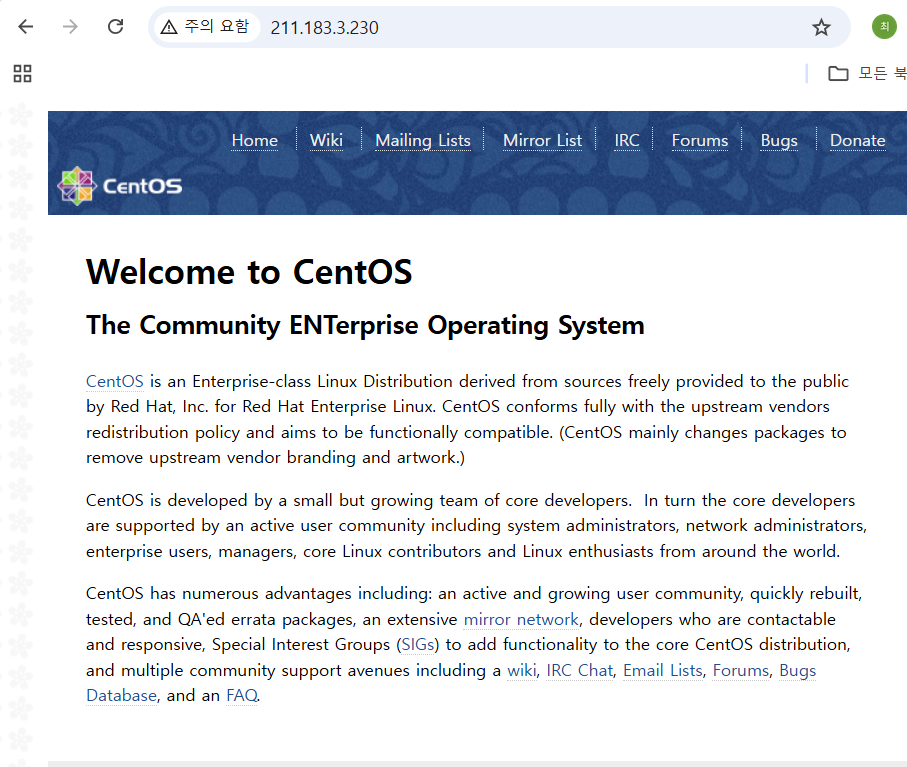
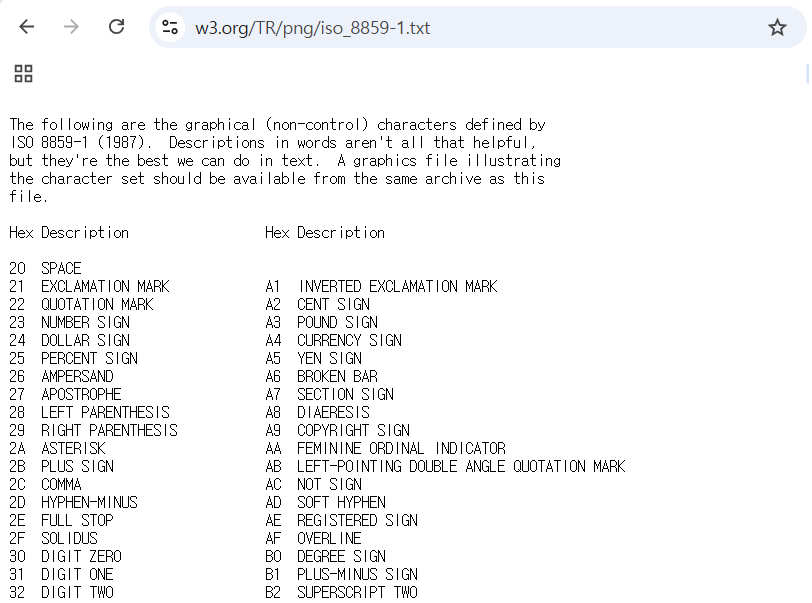
실습 05 - PlayBook : get_url 모듈
문제
rapa.inven이라는 인벤토리파일을 하나 만든 후, [web] 목록을 하나 만든다.
[web]에 속하는 서버는 211.183.3.150, 211.183.3.160인 서버이며 여기에 간단한 index.html 파일을 넣어주고자 하는데, 해당 파일은 웹상의 https://www.w3.org/TR/PNG/iso_8859-1.txt 이 파일을 받아오고자 한다. wget 같은 모듈을 찾아서 한번 해보세요. 노드에 따로 파일을 다운로드하여서 넣지 말라는 뜻
풀이
1. 서버 생성 - m4, m5
[root@cent-tem-250305 ~]# hostnamectl set-hostname m4
[root@cent-tem-250305 ~]# hostnamectl set-hostname m5
2. SSH KeyPair 전송
[root@control_node ans]# ssh-copy-id -i ~/.ssh/id_rsa.pub root@211.183.3.150
/usr/bin/ssh-copy-id: INFO: Source of key(s) to be installed: "/root/.ssh/id_rsa.pub"
/usr/bin/ssh-copy-id: INFO: attempting to log in with the new key(s), to filter out any that are already installed
/usr/bin/ssh-copy-id: INFO: 1 key(s) remain to be installed -- if you are prompted now it is to install the new keys
root@211.183.3.150's password:

Number of key(s) added: 1

Now try logging into the machine, with:   "ssh 'root@211.183.3.150'"
and check to make sure that only the key(s) you wanted were added.

[root@control_node ans]# ssh-copy-id -i ~/.ssh/id_rsa.pub root@211.183.3.160
/usr/bin/ssh-copy-id: INFO: Source of key(s) to be installed: "/root/.ssh/id_rsa.pub"
The authenticity of host '211.183.3.160 (211.183.3.160)' can't be established.
ECDSA key fingerprint is SHA256:HilRlqpqvkreg6mA4byXGDwWZQ8JFG58M6RHSV6/hq0.
ECDSA key fingerprint is MD5:f7:70:7a:fe:00:ab:ad:aa:3d:e0:75:38:ad:fa:b6:53.
Please type 'yes' or 'no': yes
root@211.183.3.160's password:

Number of key(s) added: 1

Now try logging into the machine, with:   "ssh 'root@211.183.3.160'"
and check to make sure that only the key(s) you wanted were added.
3. rapa.inven 생성 - control_node
[root@control_node ans]# vi rapa.inven

[web]
211.183.3.150
211.183.3.160
4. playbook 생성
[root@control_node ans]# vi test-5.yml

- name: make_file_wget_index
  hosts: web
  tasks:
  - name: install_epel-release
    yum:
      name: 'epel-release'
      state: present

  - name: install_wget_nginx
    yum:
      name: ['wget', 'nginx']
      state: present

  - name: disable_firewalld
    service:
      name: firewalld
      state: stopped
      enabled: no

  - name: wget_index
    get_url:
      url: "https://www.w3.org/TR/PNG/iso_8859-1.txt"
      dest: "/usr/share/nginx/html/index.html"
      mode: '0777'
  - name: start_nginx
    service:
      name: nginx
      state: started
      enabled: yes
5. playbook 실행
PLAY [make_file_wget_index] ******************************************************

TASK [Gathering Facts] ***********************************************************
ok: [211.183.3.160]
ok: [211.183.3.150]

TASK [install_epel-release] ******************************************************
changed: [211.183.3.150]
changed: [211.183.3.160]

TASK [install_wget_nginx] ********************************************************
changed: [211.183.3.150]
changed: [211.183.3.160]

TASK [disable_firewalld] *********************************************************
ok: [211.183.3.160]
ok: [211.183.3.150]

TASK [wget_index] ****************************************************************
changed: [211.183.3.160]
changed: [211.183.3.150]

TASK [start_nginx] ***************************************************************
changed: [211.183.3.150]
changed: [211.183.3.160]

PLAY RECAP ***********************************************************************
211.183.3.150              : ok=6    changed=4    unreachable=0    failed=0    skipped=0    rescued=0    ignored=0
211.183.3.160              : ok=6    changed=4    unreachable=0    failed=0    skipped=0    rescued=0    ignored=0
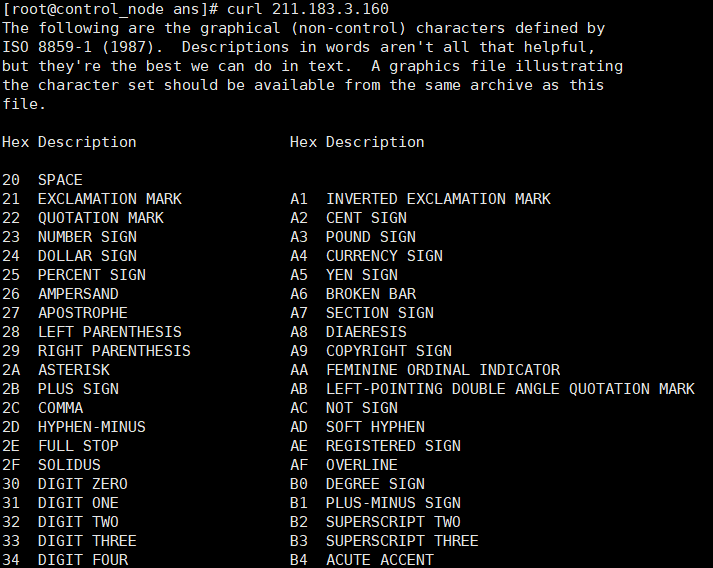
6. index.html 제공 확인

PlayBook - Shell(명령을 수행하는 모듈)
- 단순히 명령을 수행하기 때문에 ➡️ 멱등성이 보장되지 않음
👉 대체 가능한 모듈이 있다면 모듈을 사용하는 것이 좋음
1. playbook 생성
- 명령어에 준하는 모듈이 있다면 모듈을 사용하는 것이 좋음
[root@control_node ans]# vi shell.yml

# 큰 의미없는 다른 모듈로 대체 가능한 명령어 몇 개를 쳐보자
- name: shell_test_pb
  hosts: web
  tasks:
  - name: shell_test_task
    shell: "{{ item }}"
    with_items:
    - "mkdir /shelltest"
    - "cp /root/anaconda-ks.cfg /shelltest"
    - "ls -al /shelltest"
2. playbook 실행
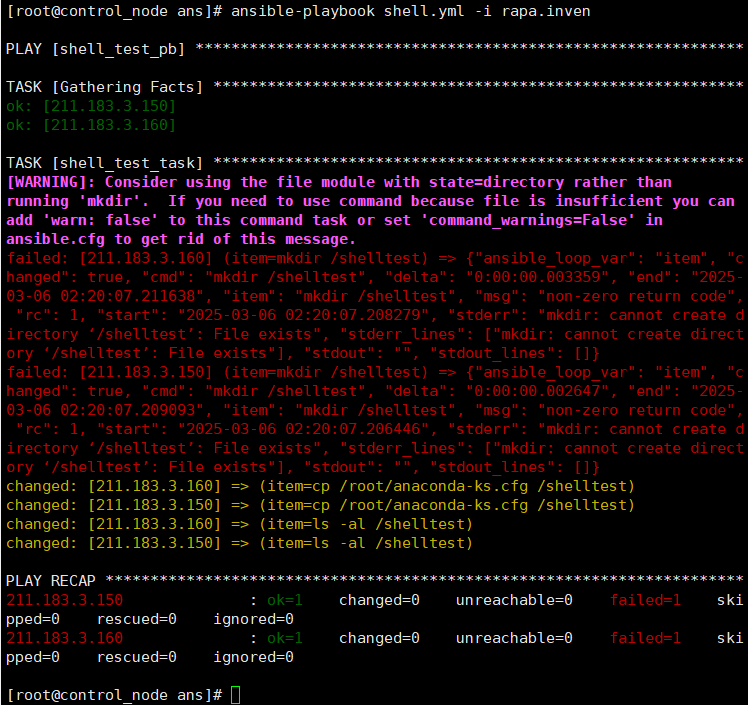
[root@control_node ans]# ansible-playbook shell.yml -i rapa.inven

PLAY [shell_test_pb] *************************************************************

TASK [Gathering Facts] ***********************************************************
ok: [211.183.3.160]
ok: [211.183.3.150]

TASK [shell_test_task] ***********************************************************
changed: [211.183.3.160] => (item=mkdir /shelltest)
changed: [211.183.3.150] => (item=mkdir /shelltest)
changed: [211.183.3.160] => (item=cp /root/anaconda-ks.cfg /shelltest)
changed: [211.183.3.150] => (item=cp /root/anaconda-ks.cfg /shelltest)
changed: [211.183.3.160] => (item=ls -al /shelltest)
[WARNING]: Consider using the file module with state=directory rather than
running 'mkdir'.  If you need to use command because file is insufficient you can
add 'warn: false' to this command task or set 'command_warnings=False' in
ansible.cfg to get rid of this message.
changed: [211.183.3.150] => (item=ls -al /shelltest)

PLAY RECAP ***********************************************************************
211.183.3.150              : ok=2    changed=1    unreachable=0    failed=0    skipped=0    rescued=0    ignored=0
211.183.3.160              : ok=2    changed=1    unreachable=0    failed=0    skipped=0    rescued=0    ignored=0
3. shell 명령이 잘 수행됨을 확인 가능

💡 playbook을 다시 실행하면 멱등성을 보장하지 않기 때문에 오류 발생
실습 06
문제
인벤토리의 [web] 서버들을 대상으로 하여 프리템플릿(고양이)을 배포해 보세요.
풀이
1. playbook 파일 생성
👉 shell로 작성하면 멱등성을 보장하지 못하기 때문에, 되도록이면 모듈을 사용해서 구성하는 것이 좋음
1-1. shell로 작성한 playbook 파일
[root@control_node ans]# vi shell_exam.yml

- name: shell_exam_pb
  hosts: web
  tasks:
  - name: stopped_firewalld
    service:
      name: firewalld
      state: stopped

  - name: install_unzip
    yum:
      name: 'unzip'
      state: present

  - name: shell_exam_task
    shell: "{{ item }}"
    with_items:
    - "wget https://www.free-css.com/assets/files/free-css-templates/download/page6/catch-info.zip -O /usr/share/nginx/html/cat.zip"
    - "unzip /usr/share/nginx/html/cat.zip -d /usr/share/nginx/html/"
    - "mv /usr/share/nginx/html/catch-info/ /usr/share/nginx/html/cat/"
2. playbook 실행
[root@control_node ans]# ansible-playbook shell_exam.yml -i rapa.inven

PLAY [shell_exam_pb] ************************************************************

TASK [Gathering Facts] **********************************************************
ok: [211.183.3.160]
ok: [211.183.3.150]

TASK [stopped_firewalld] ********************************************************
ok: [211.183.3.160]
ok: [211.183.3.150]

TASK [install_unzip] ************************************************************
ok: [211.183.3.160]
ok: [211.183.3.150]

TASK [shell_exam_task] **********************************************************
changed: [211.183.3.150] => (item=wget https://www.free-css.com/assets/files/free-css-templates/download/page6/catch-info.zip -O /usr/share/nginx/html/cat.zip)
changed: [211.183.3.160] => (item=wget https://www.free-css.com/assets/files/free-css-templates/download/page6/catch-info.zip -O /usr/share/nginx/html/cat.zip)
changed: [211.183.3.150] => (item=unzip /usr/share/nginx/html/cat.zip -d /usr/share/nginx/html/)
changed: [211.183.3.160] => (item=unzip /usr/share/nginx/html/cat.zip -d /usr/share/nginx/html/)
changed: [211.183.3.160] => (item=mv /usr/share/nginx/html/catch-info/ /usr/share/nginx/html/cat/)
[WARNING]: Consider using the get_url or uri module rather than running 'wget'.
If you need to use command because get_url or uri is insufficient you can add
'warn: false' to this command task or set 'command_warnings=False' in
ansible.cfg to get rid of this message.
[WARNING]: Consider using the unarchive module rather than running 'unzip'.  If
you need to use command because unarchive is insufficient you can add 'warn:
false' to this command task or set 'command_warnings=False' in ansible.cfg to
get rid of this message.
changed: [211.183.3.150] => (item=mv /usr/share/nginx/html/catch-info/ /usr/share/nginx/html/cat/)

PLAY RECAP **********************************************************************
211.183.3.150              : ok=4    changed=1    unreachable=0    failed=0    skipped=0    rescued=0    ignored=0
211.183.3.160              : ok=4    changed=1    unreachable=0    failed=0    skipped=0    rescued=0    ignored=0
3. 결과 확인

실습 07
문제
ansible playbook을 통해 m3는 nfs-server로, m1은 nfs-client로 구성해 보세요.
풀이
1. playbook 생성
- nfs-server
[root@control_node ans]# vi nfs-server.yml

- name: Setup NFS server (m3)
  hosts: m3
  become: yes
  tasks:
    - name: Install NFS server packages
      yum:
        name: nfs-utils
        state: present

    - name: Create shared directory
      file:
        path: /var/nfs_share
        state: directory
        mode: '0777'

    - name: Configure /etc/exports
      lineinfile:
        path: /etc/exports
        line: "/var/nfs_share *(rw,sync,no_root_squash)"
        create: yes

    - name: Export NFS shares
      command: exportfs -r

    - name: Start and enable NFS server
      service:
        name: nfs-server
        state: started
        enabled: yes

    - name: Start and enable rpcbind
      service:
        name: rpcbind
        state: started
        enabled: yes
- nfs-client
[root@control_node ans]# vi nfs-client.yml

- name: Setup NFS client (m1)
  hosts: m1
  become: yes
  tasks:
    - name: Install NFS client packages
      yum:
        name: nfs-utils
        state: present

    - name: Create mount point directory
      file:
        path: /mnt/nfs_share
        state: directory
        mode: '0777'

    - name: Mount NFS share
      mount:
        path: /mnt/nfs_share
        src: "211.183.3.230:/var/nfs_share"
        fstype: nfs
        state: mounted
        opts: rw,sync
2. playbook 실행
- m1
[root@control_node ans]# ansible-playbook nfs-client.yml -i myinven

PLAY [Setup NFS client (m1)] *****************************************************

TASK [Gathering Facts] ***********************************************************
ok: [211.183.3.210]

TASK [Install NFS client packages] ***********************************************
ok: [211.183.3.210]

TASK [Create mount point directory] **********************************************
ok: [211.183.3.210]

TASK [Mount NFS share] ***********************************************************
changed: [211.183.3.210]

PLAY RECAP ***********************************************************************
211.183.3.210 : ok=4 changed=1 unreachable=0 failed=0 skipped=0 rescued=0 ignored=0- m3
[root@control_node ans]# ansible-playbook nfs-server.yml -i myinven

PLAY [Setup NFS server (m3)] *****************************************************

TASK [Gathering Facts] ***********************************************************
ok: [211.183.3.230]

TASK [Install NFS server packages] ***********************************************
changed: [211.183.3.230]

TASK [Create shared directory] ***************************************************
changed: [211.183.3.230]

TASK [Configure /etc/exports] ****************************************************
changed: [211.183.3.230]

TASK [Export NFS shares] *********************************************************
changed: [211.183.3.230]

TASK [Start and enable NFS server] ***********************************************
changed: [211.183.3.230]

TASK [Start and enable rpcbind] **************************************************
ok: [211.183.3.230]

PLAY RECAP ***********************************************************************
211.183.3.230              : ok=7    changed=5    unreachable=0    failed=0    skipped=0    rescued=0    ignored=0
3. nfs 확인
- m1
[root@m1 ~]# df -h
Filesystem                    Size  Used Avail Use% Mounted on
devtmpfs                      898M     0  898M   0% /dev
tmpfs                         910M     0  910M   0% /dev/shm
tmpfs                         910M  9.5M  901M   2% /run
tmpfs                         910M     0  910M   0% /sys/fs/cgroup
/dev/mapper/centos-root        17G  1.8G   16G  11% /
/dev/sda1                    1014M  196M  819M  20% /boot
tmpfs                         182M     0  182M   0% /run/user/0
211.183.3.230:/var/nfs_share   17G  1.8G   16G  11% /mnt/nfs_share
[root@m1 ~]# cd /mnt/nfs_share
[root@m1 nfs_share]# ls
[root@m1 nfs_share]# echo 'nfs test' > test.txt
[root@m1 nfs_share]# ls
test.txt- m3
[root@cent-tem-250305 ~]# showmount -e
Export list for cent-tem-250305:
/var/nfs_share *

[root@cent-tem-250305 ~]# cd /var/nfs_share
[root@cent-tem-250305 nfs_share]# ls
test.txt
[root@cent-tem-250305 nfs_share]#
Ansible에서 SSH 접속 허용 설정
1. m10 서버 한대 생성 및 설정
- Spec
- IP : 211.183.3.10/24
- ssh-server에 첫 접속할 때, ssh-client의 설정파일(/etc/ssh/ssh_config)에서 위 내용을 no로 수정하고 주석을 해제하면 됐었지만,
➡️ Ansible에서는 --ssh-common-args="-o StrictHostKeyChecking=no" 옵션을 주거나
2. inventory 생성
[root@control_node ans]# vi 0307.inven

# 내용 추가
[m10]
211.183.3.10
3. public key 심기 - managed node(=m10)
[root@control_node ans]# ssh-copy-id -i ~/.ssh/id_rsa.pub root@211.183.3.10
/usr/bin/ssh-copy-id: INFO: Source of key(s) to be installed: "/root/.ssh/id_rsa.pub"
The authenticity of host '211.183.3.10 (211.183.3.10)' can't be established.
ECDSA key fingerprint is SHA256:HilRlqpqvkreg6mA4byXGDwWZQ8JFG58M6RHSV6/hq0.
ECDSA key fingerprint is MD5:f7:70:7a:fe:00:ab:ad:aa:3d:e0:75:38:ad:fa:b6:53.
Are you sure you want to continue connecting (yes/no)? yes
/usr/bin/ssh-copy-id: INFO: attempting to log in with the new key(s), to filter out any that are already installed
/usr/bin/ssh-copy-id: INFO: 1 key(s) remain to be installed -- if you are prompted now it is to install the new keys
root@211.183.3.10's password:

Number of key(s) added: 1

Now try logging into the machine, with:   "ssh 'root@211.183.3.10'"
and check to make sure that only the key(s) you wanted were added.
💡SSH 접속 초기 상태로 돌리는 방법
# 여기에 없는 대상을 확인하고 물어보는것이 StrictHostKeyChecking 옵션
[root@control_node ans]# vi ~/.ssh/known_hosts

# 주석처리 ➡️ 한 번도 ssh 접속하지 않은 상태로 돌아감
#211.183.3.10 ecdsa-sha2-nistp256 AAAAE2VjZHNhLXNoYTItbmlzdHAyNTYAAAAIbmlzdHAyNTYAAABBBH4gUzpOUucWzOA2y0BMJbdwXlZ/4HQsZOLSAli6wfrZkeY+o4YJOGZaVzDdVULh0tVNBUedKzbmiDGnFibGKYY=
방법 1️⃣ - ansible의 --ssh-common-args 옵션 사용
# --ssh-common-args 명령이 유효한지 확인하기 위해서 known_hosts 파일에 들어가서 한번도 접속하지 않은 상태로 만들어줌
[root@control_node ans]# ansible  m10 -i 0307.inven -m ping --ssh-common-args="-o
StrictHostKeyChecking=no"
211.183.3.10 | SUCCESS => {
    "ansible_facts": {
        "discovered_interpreter_python": "/usr/bin/python"
    },
    "changed": false,
    "ping": "pong"
}- 위에서 처럼 인자(옵션)를 계속 붙여줘도 괜찮고, 인벤토리에 추가해줘도 괜찮음
방법 2️⃣ - iventory 파일에 등록
- known_hosts의 m10 삭제 - 초기 상태로 되돌리기
[root@control_node ans]# vi ~/.ssh/known_hosts
#211.183.3.10 ecdsa-sha2-nistp256 AAAAE2VjZHNhLXNoYTItbmlzdHAyNTYAAAAIbmlzdHAyNTYAAABBBH4gUzpOUucWzOA2y0BMJbdwXlZ/4HQsZOLSAli6wfrZkeY+o4YJOGZaVzDdVULh0tVNBUedKzbmiDGnFibGKYY=- 인벤토리에 등록
[root@control_node ans]# vi 0307.inven

# 내용 추가
[m10]
211.183.3.10
[m10:vars]
ansible_ssh_common_args="-o StrictHostKeyChecking=no"- 설정 확인
[root@control_node ans]# ansible  m10 -i 0307.inven -m ping --ssh-common-args="-o StrictHostKeyChecking=no"
211.183.3.10 | SUCCESS => {
    "ansible_facts": {
        "discovered_interpreter_python": "/usr/bin/python"
    },
    "changed": false,
    "ping": "pong"
}
PlayBook - Debug 모듈(특정 변수의 값을 출력하거나, 메세지를 보여주는 모듈)
- ansible_facts = 대상 노드의 정보를 가져옴
➡️ ansible_facts가 활성화되어 있어야 debug 모듈을 사용 가능 - ansible_facts의 default값 = true ➡️ false를 하지 않으면 사용할 때, 문제없음
1. yml 파일 생성 - ansible_facts 확인
[root@control_node ans]# vi debug.yml

# 대상 노드의 ansible_facts라는 변수(ansible이 지정해 놓은)의 값을 보여줘
- name: debut_pb
  hosts: m10
  tasks:
  - name: show_facts
    debug:
      var: ansible_facts
2. playbook 실행
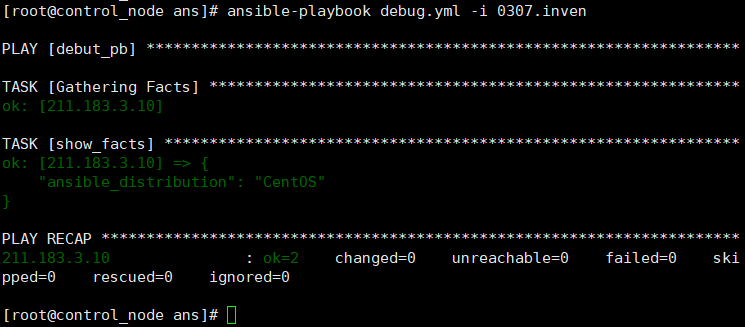
[root@control_node ans]# ansible-playbook debug.yml -i 0307.inven

- node에 설치할 수 있는 OS의 계열에 맞게 데몬을 설정하기 위해서 debug 모듈을 사용할 수 있음
3. playbook 수정 - ansible_distribution 확인
- 특정한 변수에 대한 값만 불러옴
[root@control_node ans]# vi debug.yml

- name: debut_pb
  hosts: m10
  tasks:
  - name: show_facts
    debug:
      var: ansible_distribution
4. playbook 실행
PlayBook - register(모듈의 수행 결과값을 변수에 저장하는 모듈)
1. playbook 생성
[root@control_node ans]# vi reg.yml

- name: register_pb
  hosts: m10
  tasks:
  - name: ls_reg
    shell: ls
    register: ls_result # ls_result = word(사용자가 지정 가능한 변수)

  # ls_result에 저장된 값을 보여줌
  - name: show_ls_result
    debug:
      var: ls_result
2. playbook 실행
[root@control_node ans]# ansible-playbook reg.yml -i 0307.inven

PLAY [register_pb] ***************************************************************

TASK [Gathering Facts] ***********************************************************
ok: [211.183.3.10]

TASK [ls_reg] ********************************************************************
changed: [211.183.3.10]

TASK [show_ls_result] ************************************************************
ok: [211.183.3.10] => {
    "ls_result": {
        "changed": true,
        "cmd": "ls", # 수행한 명령
        "delta": "0:00:00.002562",
        "end": "2025-03-06 20:46:42.813925",
        "failed": false,
        "rc": 0,
        "start": "2025-03-06 20:46:42.811363",
        "stderr": "",
        "stderr_lines": [],
        "stdout": "anaconda-ks.cfg", # 수행한 명령의 결과값
        "stdout_lines": [
            "anaconda-ks.cfg"
        ]
    }
}

PLAY RECAP ***********************************************************************
211.183.3.10 : ok=3 changed=1 unreachable=0 failed=0 skipped=0 rescued=0 ignored=0- m10에서 ls 명령어를 친 결과와 동일

'CS > Linux' 카테고리의 다른 글
| [VMWare] 24-2. IaC - Ansible & PlayBook (0) | 2025.03.07 |
|---|---|
| [VMWare] 23-1. 서버 모니터링 - telegraf, influxdb, grafana (1) | 2025.03.05 |
| [VMware] 22-1. OpenVSwitch(OVS) (1) | 2025.02.28 |
| [VMware] 20. KVM(Kernel-based Virtual Machine) (1) | 2025.02.15 |
| [VMware] 19-1. VPN - Site to Site VPN (0) | 2025.02.14 |


