

| 일 | 월 | 화 | 수 | 목 | 금 | 토 |
|---|---|---|---|---|---|---|
| 1 | 2 | 3 | 4 | 5 | ||
| 6 | 7 | 8 | 9 | 10 | 11 | 12 |
| 13 | 14 | 15 | 16 | 17 | 18 | 19 |
| 20 | 21 | 22 | 23 | 24 | 25 | 26 |
| 27 | 28 | 29 | 30 |
- Ebs
- aws cloud school
- Firewall
- aws saa
- docker
- 네트워크
- AWS
- aws cloud
- 쿠버네티스
- KUBECTL
- NAT
- ALB
- EC2 인스턴스
- linux
- DNS
- Kubernetes
- aws cloud shcool 8
- vmware
- IAM
- vyos
- load balancer
- FTP
- aws SAA-c03
- AWS 자격증
- Troubleshooting
- tftp
- aws iam
- GNS3
- EC2
- SAA-C03
- Today
- Total
나의 공부기록
[VMware] 13-1. Proxy & Reverse Proxy & 3 Tier 본문
Proxy Server - 다수의 Client를 대리

- Proxy : 대리/대체
- Client에서 공통적인 요청이 있을 때, Proxy Server에서 한 번에 요청&응답 처리
- 🌟누가 주체고 누가 대리하는지 파악하는 것이 중요함
Proxy Server 기능
1. 캐싱(Caching)
2. 클라이언트 보호
- 외부의 공격으로부터 보호
- 예) 외부에서 랜섬웨어의 공격을 받을 경우, Proxy Server에서 막아줄 수 있음
3. 클라이언트 차단
- 정보의 보호 목적
- 예) 인터넷을 차단하는 경우, Proxy Server가 허용하지 않으면 정보가 나갈 수 없음
💡 SSH(Secure SHell)
- 네트워크 상에서 안전하게 원격 시스템에 접속하고, 데이터를 암호화(=메세지 암호화)하여 보호하는 프로토콜
- 보통 서버 관리, 원격 터미널 접속, 파일 전송(SCP, SFTP) 등에 사용
- TCP, 22 Port 사용
↔️ Telnet
- 보안 X(평문 메세지) 원격 접속 프로토콜
- TCP, 23 Port
SSH 특징
1. 키페어(Key Pair) - 비대칭 키
- Private Key(개인 키) : 노출되면❌ = 열쇠
- Public Key(공개 키) : 노출 가능 = 자물쇠
- 키페어 알고리즘 ➡️ ecdsa / rsa
2. 인증
- CentOS ➡️ ID/PW 인증 허용
- 대부분의 Ubuntu ➡️ 공개 키 방식 사용(Key Pair)
- 공개 키 방식 ≠ 공개 키를 갖고 있음
- 인증 완료 ➡️ 세션 수립
3. 암호화
- AES(Advanced Encryption Standard = 대칭키)
- 메세지를 어떻게 암호화/복호화할지
- 키를 만드는 알고리즘이 존재
💡암호화 VS 해시
암호화
- 평문 메세지를 복호화할 수 있음
해시
- 평문 메세지를 복호화할 수 없음
- 메세지 위/변조 여부는 검증할 수 있음
SSH 기본 동작 방식

- Client(Xshell)에서 Server에 SSH로 접속할 때, 위의 절차가 진행됨
- 세션을 맺게 되면 리눅스의 경우 ~./ssh/known_hosts에 공개키를 저장
👉 .ssh의 '.' : 숨김파일 - Xshell의 경우, 첫 접속 시 "알 수 없는 호스트 키"로 경고
➡️ 경고를 받지 않는 방법도 실습할 예정
Proxy 과정
Proxy Server
1. 초기 설정
- 방화벽
[root@proxy ~]# systemctl stop firewalld
[root@proxy ~]# systemctl disable firewalld
Removed symlink /etc/systemd/system/multi-user.target.wants/firewalld.service.
Removed symlink /etc/systemd/system/dbus-org.fedoraproject.FirewallD1.service.- SELINUX
[root@proxy ~]# sed -i s/SELINUX=enforcing/SELINUX=disabled/g /etc/selinux/config- 레포지토리
[root@proxy ~]# cat <<EOF > /etc/yum.repos.d/CentOS-Base.repo
> [base]
> name=CentOS-$releasever - Base
> #mirrorlist=http://mirrorlist.centos.org/?release=$releasever&arch=$basearch&repo=os&infra=$infra
> baseurl=https://vault.centos.org/7.9.2009/os/x86_64/
> gpgcheck=1
> gpgkey=file:///etc/pki/rpm-gpg/RPM-GPG-KEY-CentOS-7
>
> #released updates
> [updates]
> name=CentOS-$releasever - Updates
> #mirrorlist=http://mirrorlist.centos.org/?release=$releasever&arch=$basearch&repo=updates&infra=$infra
> baseurl=https://vault.centos.org/7.9.2009/updates/x86_64/
> gpgcheck=1
> gpgkey=file:///etc/pki/rpm-gpg/RPM-GPG-KEY-CentOS-7
>
> #additional packages that may be useful
> [extras]
> name=CentOS-$releasever - Extras
> #mirrorlist=http://mirrorlist.centos.org/?release=$releasever&arch=$basearch&repo=extras&infra=$infra
> baseurl=https://vault.centos.org/7.9.2009/extras/x86_64/
> gpgcheck=1
> gpgkey=file:///etc/pki/rpm-gpg/RPM-GPG-KEY-CentOS-7
>
> #additional packages that extend functionality of existing packages
> [centosplus]
> name=CentOS-$releasever - Plus
> #mirrorlist=http://mirrorlist.centos.org/?release=$releasever&arch=$basearch&repo=centosplus&infra=$infra
> baseurl=https://vault.centos.org/7.9.2009/centosplus/x86_64/
> gpgcheck=1
> enabled=0
> gpgkey=file:///etc/pki/rpm-gpg/RPM-GPG-KEY-CentOS-7
>
> #contrib - packages by Centos Users
> [contrib]
> name=CentOS-$releasever - Contrib
> #mirrorlist=http://mirrorlist.centos.org/?release=$releasever&arch=$basearch&repo=contrib&infra=$infra
> baseurl=https://vault.centos.org/7.9.2009/contrib/x86_64/
> gpgcheck=1
> enabled=0
> gpgkey=file:///etc/pki/rpm-gpg/RPM-GPG-KEY-CentOS-7
> EOF- 재부팅
[root@proxy ~]# init 6
2. squid 패키지 설치
[root@proxy ~]# yum install -y squid
3. Proxy 대상 설정
- ACL 설정
- http_access 허용
- cache_dir 주석 해제
[root@proxy ~]# vi /etc/squid/squid.conf

# ACL 추가
# client가 있는 대역 설정
# localnet 이라는 이름의 출발지 주소 = 대리하고 싶은 서버인 mint가 속한 대역
[수정 내용]
# Recommended minimum configuration:
#

# Example rule allowing access from your local networks.
# Adapt to list your (internal) IP networks from where browsing
# should be allowed
acl localnet src 10.0.0.0/8     # RFC1918 possible internal network
acl localnet src 172.16.0.0/12  # RFC1918 possible internal network

# 211.183.3.0/24 대역과 충돌날까봐 주석처리
# acl localnet src 192.168.0.0/16 # RFC1918 possible internal network
acl localnet src fc00::/7       # RFC 4193 local private network range
acl localnet src fe80::/10      # RFC 4291 link-local (directly plugged) machines
acl localnet src 211.183.3.0/24 # mint network

acl SSL_ports port 443
acl Safe_ports port 80          # http
acl Safe_ports port 21          # ftp
acl Safe_ports port 443         # https
acl Safe_ports port 210         # wais
acl Safe_ports port 1025-65535  # unregistered ports
acl Safe_ports port 280         # http-mgmt
acl Safe_ports port 488         # gss-http
acl Safe_ports port 591         # filemaker
acl Safe_ports port 777         # multiling http
acl CONNECT method CONNECT
...
# Example rule allowing access from your local networks.
# Adapt localnet in the ACL section to list your (internal) IP networks
# from where browsing should be allowed
http_access allow localnet
http_access allow localhost

# deny -> allow 수정
# And finally deny all other access to this proxy
http_access allow all

# Squid normally listens to port 3128
http_port 3128

# cache_dir 주석 해제
# 대리하여 가져온 파일들을 저장할 디렉토리 지정
# Uncomment and adjust the following to add a disk cache directory.
cache_dir ufs /var/spool/squid 100 16 256
4. Squid 패키지 재시작
[root@proxy ~]# systemctl restart squid
[root@proxy ~]# systemctl status squid
● squid.service - Squid caching proxy
   Loaded: loaded (/usr/lib/systemd/system/squid.service; disabled; vendor preset: disabled)
   Active: active (running) since Sun 2025-02-02 21:20:39 EST; 35s ago
  Process: 1489 ExecStart=/usr/sbin/squid $SQUID_OPTS -f $SQUID_CONF (code=exited, status=0/SUCCESS)
  Process: 1483 ExecStartPre=/usr/libexec/squid/cache_swap.sh (code=exited, status=0/SUCCESS)
Proxy Client
1. 서버 생성
- Spec
- OS Version : Ubuntu 64-bit
- VM name : mint
- 2Core, 2Processor
- 4GB
- 20GB
- OS 설치 전
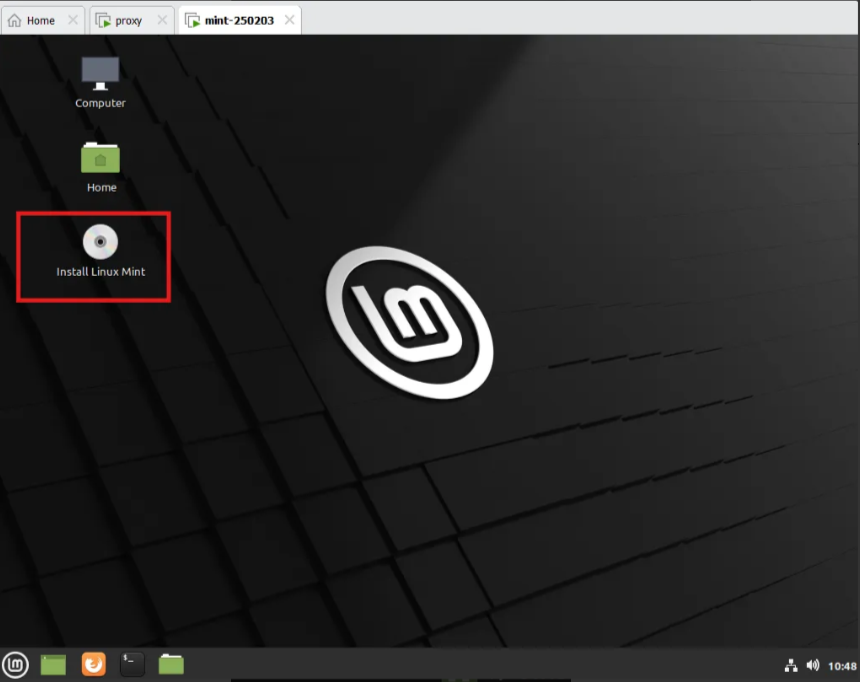
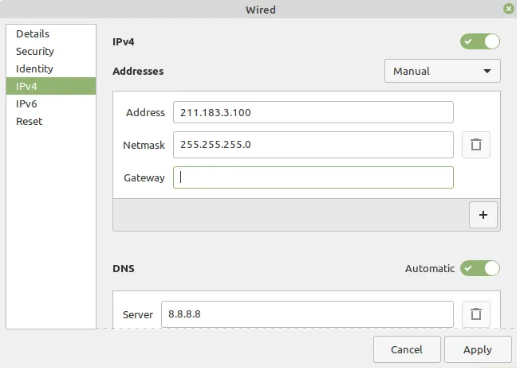
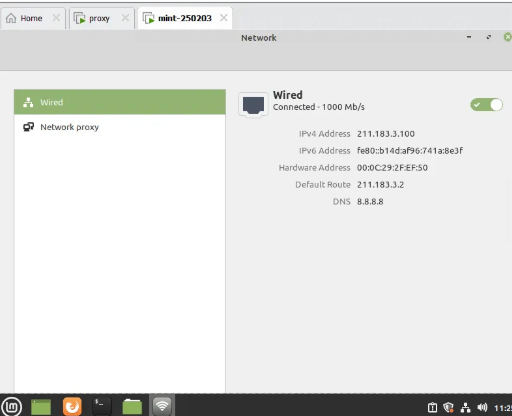
- IP 설정
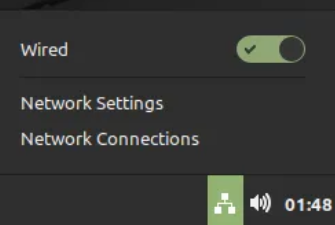
2. 대리할 서버 지정
- Gateway 삭제
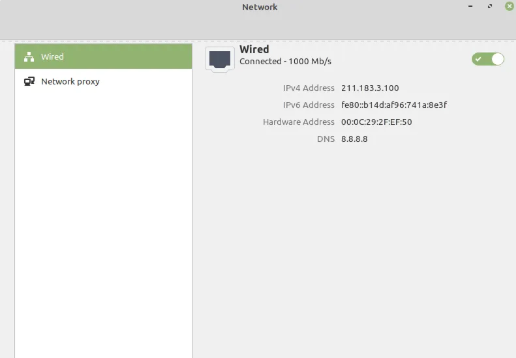
- network settings > Network Proxy
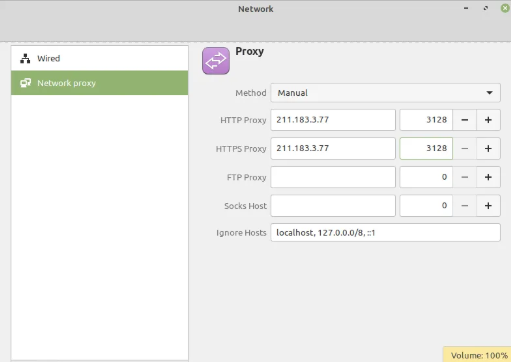
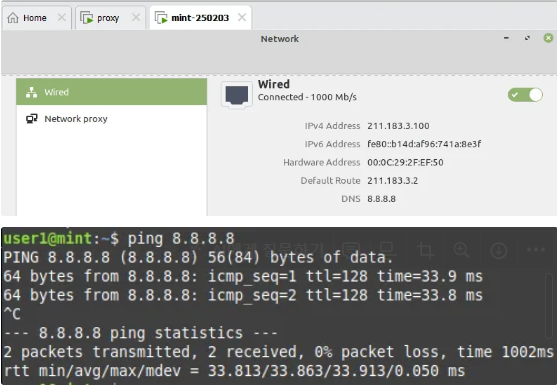
3. Proxy Test
- Gateway 없음에도 통신이 잘 됨
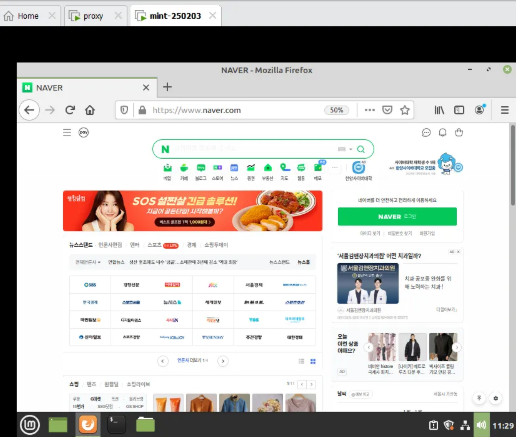
- /var/log/squid/access.log 확인 - Proxy Server
- Proxy Server를 통한 접속인지 확인
[root@proxy ~]# cd /var/log/squid
[root@proxy squid]# ls
access.log  cache.log  squid.out
[root@proxy squid]# cat access.log
1738549716.240     97 211.183.3.100 TCP_MISS/200 985 POST http://r11.o.lencr.org/ - HIER_DIRECT/23.67.53.19 application/ocsp-response
1738549716.567     67 211.183.3.100 TCP_MISS/200 970 POST http://ocsp.digicert.com/ - HIER_DIRECT/23.36.55.181 application/ocsp-response
1738549716.567     69 211.183.3.100 TCP_MISS/200 969 POST http://ocsp.digicert.com/ - HIER_DIRECT/23.36.55.181 application/ocsp-response
Proxy 실습 - Client(Xshel) ➡️ Server(Client) 접속
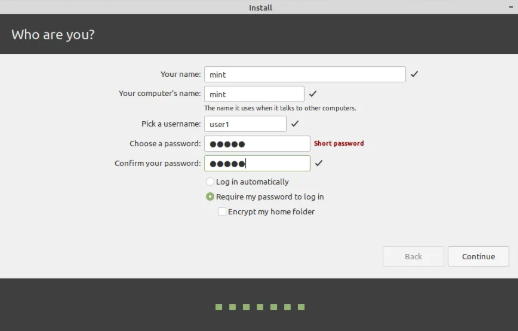
계정의 패스워드 설정 명령은 passwd <계정명><패스워드>입니다. 민트 서버의 root 계정을 설정한 다음. root 계정으로 ssh 접속을 해보세요.
1. Gateway 추가 ➡️ 외부접속 확인
2. root 비밀번호 설정
user1@mint:~$ sudo passwd root
New password:
Retype new password:
passwd: password updated successfully
3. root 접속
- su : superuser
user1@mint:~$ su
Password: # test123
root@mint:/home/user1#
4. sshd 패키지 확인 & sshd 패키지 설치
user1@mint:~$ su
Password:
root@mint:/home/user1# systemctl status sshd
Unit sshd.service could not be found.
# sshd 포트 점유X -> 존재X
root@mint:/home/user1# ss -tnlp
State     Recv-Q    Send-Q       Local Address:Port        Peer Address:Port    Process
LISTEN    0         4096         127.0.0.53%lo:53               0.0.0.0:*        users:(("systemd-resolve",pid=644,fd=13))
LISTEN    0         5                127.0.0.1:631              0.0.0.0:*        users:(("cupsd",pid=715,fd=7))
LISTEN    0         5                    [::1]:631                 [::]:*        users:(("cupsd",pid=715,fd=6))

# 틀린 패키지명 입력 -> 올바른 패키지명 알려줌
root@mint:/home/user1# apt install -y ssh-server
Reading package lists... Done
Building dependency tree
Reading state information... Done
Package ssh-server is a virtual package provided by:
  openssh-server:i386 1:8.2p1-4ubuntu0.11
  openssh-server 1:8.2p1-4ubuntu0.11
  tinysshd 20190101-1build1
  lsh-server 2.1-12build3
  dropbear-bin 2019.78-2build1
You should explicitly select one to install.

E: Package 'ssh-server' has no installation candidate

# 패키지 설치
root@mint:/home/user1# apt install -y openssh-server


# Ubuntu or Linux Server에서 패키지 설치 X -> 업데이트 후, 설치 진행
root@mint:/home/user1# apt update -y

# sshd 활성화 확인
root@mint:/home/user1# systemctl status sshd
● ssh.service - OpenBSD Secure Shell server
     Loaded: loaded (/lib/systemd/system/ssh.service; enabled; vendor preset: e>
     Active: active (running) since Mon 2025-02-03 12:09:27 KST; 2min 2s ago
       Docs: man:sshd(8)
             man:sshd_config(5)
   Main PID: 3684 (sshd)
      Tasks: 1 (limit: 4583)
     Memory: 1.4M
     CGroup: /system.slice/ssh.service
             └─3684 sshd: /usr/sbin/sshd -D [listener] 0 of 10-100 startups

Feb 03 12:09:26 mint systemd[1]: Starting OpenBSD Secure Shell server...
Feb 03 12:09:27 mint sshd[3684]: Server listening on 0.0.0.0 port 22.
Feb 03 12:09:27 mint sshd[3684]: Server listening on :: port 22.
Feb 03 12:09:27 mint systemd[1]: Started OpenBSD Secure Shell server.

# 방화벽 확인
# 방화벽 존재X
# 대부분의 우분투 서버는 기본적으로 방화벽 비활성화되어 있음
# 우분투 방화벽 설정 명령 : ufw
root@mint:/home/user1# systemctl status firewalld
Unit firewalld.service could not be found.
5. xshell 암호 거부
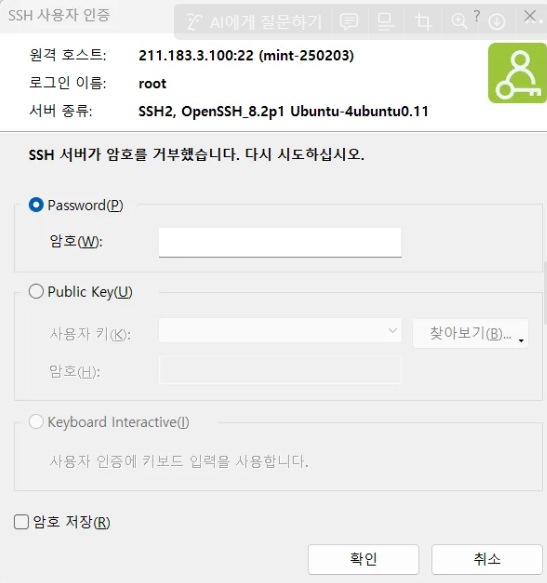
- root 암호 다시 검증
user1@mint:~$ su root
Password:
root@mint:/home/user1#
➡️ root 계정으로 ssh에 접속 불가능한 상태
6. user1 계정으로 xshell 접속
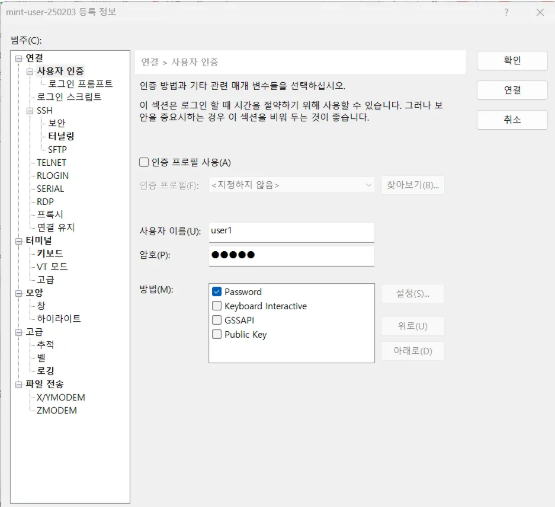
- user1 계정으로 접속 가능
💡root 계정으로 client 서버에 접속 안 되는 이유
- 인증 방식이 ID/PW를 불허하고 있기 때문
- openssh-server의 설정 변경하면 접속 가능
- 프로그램 자체의 설정을 변경
7. ssh 설정 변경
- ssh_config : Client -> 외부로 접속할 때
- sshd_config : 외부 -> Client로 접속할 때
# rsa / ecdsa 방식이 존재함을 확인 가능
# -> key pair 만드는 알고리즘
# pub = public key
# pub X = private key
root@mint:/home/user1# vi /etc/ssh/
moduli                    sshd_config.d/            ssh_host_ed25519_key.pub
ssh_config                ssh_host_ecdsa_key        ssh_host_rsa_key
ssh_config.d/             ssh_host_ecdsa_key.pub    ssh_host_rsa_key.pub
sshd_config               ssh_host_ed25519_key      ssh_import_id

# SSH Server의 인증방식을 ID/PW 허용
root@mint:/home/user1# vi /etc/ssh/sshd_config
[수정 내용]

Include /etc/ssh/sshd_config.d/*.conf

#Port 22
#AddressFamily any
#ListenAddress 0.0.0.0
#ListenAddress ::

#HostKey /etc/ssh/ssh_host_rsa_key
#HostKey /etc/ssh/ssh_host_ecdsa_key
#HostKey /etc/ssh/ssh_host_ed25519_key

# 인증 부분
# Authentication:

#LoginGraceTime 2m

# root 로그인이 password 제한
# 주석 해제 ➡️ prohibit-password -> yes
PermitRootLogin yes
#StrictModes yes
#MaxAuthTries 6
💡 vim 편집기 업데이트
- vim 편집기에 문제가 발생하면 업데이트 진행
root@mint:/home/user1# apt install -y vim
8. sshd 재부팅
oot@mint:/home/user1# systemctl restart sshd
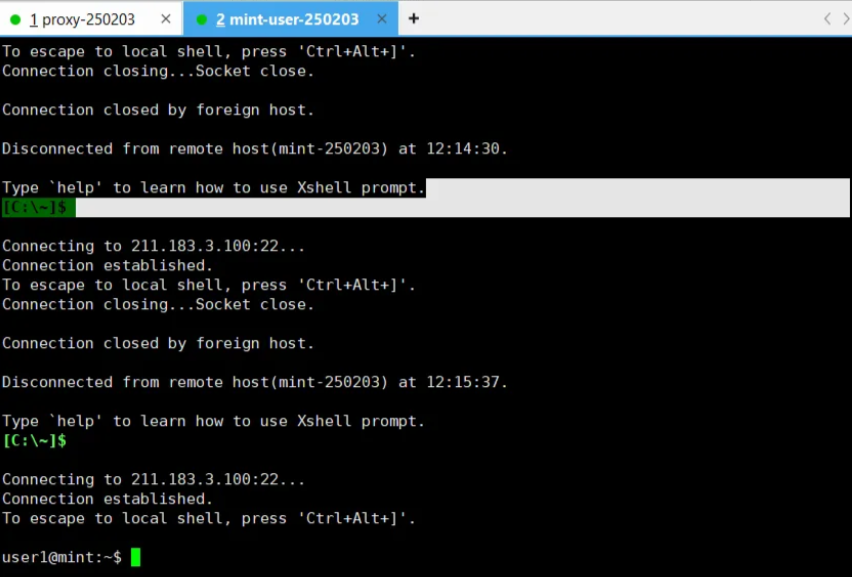
9. root 계정 접속 확인
- root 계정으로 접속 가능(ID/PW)
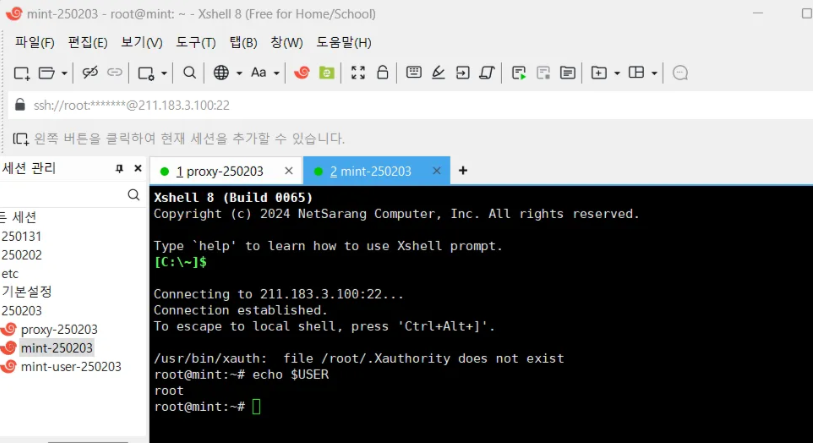
Proxy 실습 - Client(Proxy) ➡️ Server(Mint) 접속
1. Proxy ➡️ Mint 접속
[root@proxy squid]# ssh root@211.183.3.100
The authenticity of host '211.183.3.100 (211.183.3.100)' can't be established.
ECDSA key fingerprint is SHA256:UvEMhMioYpQKhR1o28gGTwzcyUKoQZfdaBQE1VQc9d8.
ECDSA key fingerprint is MD5:54:e8:61:73:c0:7b:06:c0:b5:34:fb:ff:4d:a7:08:7b.
Are you sure you want to continue connecting (yes/no)?
# 공개키를 전달하며, 접속한 적이 없음을 알려줌

# 접속할 것인지 물어봄
Are you sure you want to continue connecting (yes/no)? yes
Warning: Permanently added '211.183.3.100' (ECDSA) to the list of known hosts.
root@211.183.3.100's password:
Last login: Mon Feb  3 14:27:49 2025 from 211.183.3.1
root@mint:~#
2. Mint ➡️ Proxy 이동
root@mint:~# exit
logout
Connection to 211.183.3.100 closed.
3. known_hosts 확인
# known_hosts 파일 생성
# known_hosts : 내가 접속했던 서버들의 공개키 저장 파일
[root@proxy squid]# ls ~/.ssh/
known_hosts

# mint의 공개키 확인 가능
# ecdsa 방식으로 생성된 공개
[root@proxy squid]# cat ~/.ssh/known_hosts
211.183.3.100 ecdsa-sha2-nistp256 AAAAE2VjZHNhLXNoYTItbmlzdHAyNTYAAAAIbmlzdHAyNTYAAABBBCL5x1JX7NutFPcYUWBUBpJ8SaWIZAPzUgWXUdqNQmhBarg2Aa8CoodMOVcg9kE7kOAHz51vaj44V2LYqKTG5xk=
4. known_hosts 파일 삭제
[root@proxy ~]# cd ~/.ssh/
[root@proxy .ssh]# rm known_hosts
rm: remove regular file ‘known_hosts’? y
5. ssh_config 파일 수정
- knwon_hosts를 삭제하고, xshell에서 첫 접속(=공개 키를 모르는 상태)할 때, yes 안 치고 접속 가능하게 하는 방법
[root@proxy .ssh]# vi /etc/ssh/ssh_config

[수정 내용]
# 주석해제 ask -> no
   StrictHostKeyChecking no

# 위와 동일한 명령어
[root@proxy .ssh]# ssh -o StrictHostKeyChecking=no root@211.183.3.100
Warning: Permanently added '211.183.3.100' (ECDSA) to the list of known hosts.
root@211.183.3.100's password:
Last login: Mon Feb  3 14:37:50 2025 from 211.183.3.1
Reverse Proxy - 다수의 Server 대리

- 서버가 클라이언트에게 요청에 대한 응답을 해주는 것이 아니라 Reverse Proxy Server가 대신 수행
- 응답하는 주체를 변경(클라이언트가 헷갈리지 않게 하기 위해서)
3 Tier Architecture

- tier : 물리적(=다른 서버) / layer : 논리적(계층)
- Client(서비스를 받는 사용자들)이 접근 가능한 서버는 Web Server
- WAS/DB는 접근 불가능한 장소에 존재해야 함
💡서로 독립적인 서버 구성 장점
1. 확장성 ⬆️
👉 효율적인 자원 할당 가능 ➡️ 각 서버에 필요한 자원이 다름
2. 유지보수가 독립적
👉 서버 중 하나에 문제가 발생해도 다른 서버에 영향을 미치지 않음
3. 보안성 ⬆️
👉 사용자는 web 서버에만 접근 가능 ➡️ 데이터의 보안성 증가
3 Tier 과정
- 원래 과정은 역순으로 DB > Tomcat > Web이지만, 첫 실습이니 가장 복잡한 Tomcat Server 먼저 구성할 예정
Server Spec
- httpd
- Port : 80
- Tomcat
- JAVA의 WAS 서버
- Port : 8080
- CentOS 7, 2 Core, 2GB, 20GB
- MariaDB
- Port : 3306
Tomcat Server
- 자바로 웹 페이지(웹앱)을 만들었다면, 이런 웹 애플리케이션을 배포하는 웹 애플리케이션 서버
- 개발 환경 구성 필요
- JAVA(OpenJDK-11)
- Tomcat(10 Version)
1. 초기 설정
- 방화벽 해제
[root@tomcat-250203 tomcat]# systemctl stop firewalld
[root@tomcat-250203 tomcat]# systemctl disable firewalld- SELINUX 비활성화
[root@tomcat-250203 tomcat]# sed -i s/SELINUX=enforcing/SELINUX=disabled/g /etc/selinux/config- 레포지토리
[root@tomcat-250203 tomcat]# cat <<EOF > /etc/yum.repos.d/CentOS-Base.repo
[base]
name=CentOS-$releasever - Base
#mirrorlist=http://mirrorlist.centos.org/?release=$releasever&arch=$basearch&repo=os&infra=$infra
baseurl=https://vault.centos.org/7.9.2009/os/x86_64/
gpgcheck=1
gpgkey=file:///etc/pki/rpm-gpg/RPM-GPG-KEY-CentOS-7

#released updates
[updates]
name=CentOS-$releasever - Updates
#mirrorlist=http://mirrorlist.centos.org/?release=$releasever&arch=$basearch&repo=updates&infra=$infra
baseurl=https://vault.centos.org/7.9.2009/updates/x86_64/
gpgcheck=1
gpgkey=file:///etc/pki/rpm-gpg/RPM-GPG-KEY-CentOS-7

#additional packages that may be useful
[extras]
name=CentOS-$releasever - Extras
#mirrorlist=http://mirrorlist.centos.org/?release=$releasever&arch=$basearch&repo=extras&infra=$infra
baseurl=https://vault.centos.org/7.9.2009/extras/x86_64/
gpgcheck=1
gpgkey=file:///etc/pki/rpm-gpg/RPM-GPG-KEY-CentOS-7

#additional packages that extend functionality of existing packages
[centosplus]
name=CentOS-$releasever - Plus
#mirrorlist=http://mirrorlist.centos.org/?release=$releasever&arch=$basearch&repo=centosplus&infra=$infra
baseurl=https://vault.centos.org/7.9.2009/centosplus/x86_64/
gpgcheck=1
enabled=0
gpgkey=file:///etc/pki/rpm-gpg/RPM-GPG-KEY-CentOS-7

#contrib - packages by Centos Users
[contrib]
name=CentOS-$releasever - Contrib
#mirrorlist=http://mirrorlist.centos.org/?release=$releasever&arch=$basearch&repo=contrib&infra=$infra
baseurl=https://vault.centos.org/7.9.2009/contrib/x86_64/
gpgcheck=1
enabled=0
gpgkey=file:///etc/pki/rpm-gpg/RPM-GPG-KEY-CentOS-7
EOF- 재부팅
[root@tomcat-250203 tomcat]# init 6
2. java-11-openjdk & wget & unzip 패키지 설치
[root@tomcat-250203 ~]# yum install -y java-11-openjdk wget unzip

# JAVA 설치 & Version 확인
[root@tomcat-250203 ~]# java -version
openjdk version "11.0.23" 2024-04-16 LTS
OpenJDK Runtime Environment (Red_Hat-11.0.23.0.9-2.el7_9) (build 11.0.23+9-LTS)
OpenJDK 64-Bit Server VM (Red_Hat-11.0.23.0.9-2.el7_9) (build 11.0.23+9-LTS, mixed mode, sharing)
3. tomcat 설치
- webapps
- 웹 애플리케이션 루트 디렉토리
- 의존성 및 소스코드를 패키징한 파일을 자동으로 압축해제 시켜줌
- .WAR = 웹앱 압축 파일
[root@tomcat-250203 ~]# wget https://dlcdn.apache.org/tomcat/tomcat-10/v10.1.34/bin/apache-tomcat-10.1.34.zip

[root@tomcat-250203 ~]# ls
anaconda-ks.cfg  apache-tomcat-10.1.34.zip

[root@tomcat-250203 ~]# unzip apache-tomcat-10.1.34.zip > /dev/null
[root@tomcat-250203 ~]# ls
anaconda-ks.cfg  apache-tomcat-10.1.34  apache-tomcat-10.1.34.zip
[root@tomcat-250203 ~]# rm -rf apache-tomcat-10.1.34.zip
[root@tomcat-250203 ~]# mv apache-tomcat-10.1.34/ tomcat

# bin : 실행파일(동작, 중지) / conf : 설정 파일
# lib : 라이브러리 or 모듈 / logs : 로그
# webapps : 웹 애플리케이션 배포 디렉토리 -> .WAR=웹앱 압축
[root@tomcat-250203 tomcat]# ls
bin           conf             lib      logs    README.md      RUNNING.txt  webapps
BUILDING.txt  CONTRIBUTING.md  LICENSE  NOTICE  RELEASE-NOTES  temp         work
4. tomcat 파일 권한 부여
- 동작 파일을 실행하기 위해 모든 권한 부여
[root@tomcat-250203 tomcat]# chmod 777 -R /root/tomcat
5. tomcat 실행
# 1) 실행파일 명시
# ./bin/startup.sh -> 스크립트파일
[root@tomcat-250203 tomcat]# sh ./bin/startup.sh
# 2) 실행파일 명시X
[root@tomcat-250203 tomcat]# ./bin/startup.sh
Using CATALINA_BASE:   /root/tomcat
Using CATALINA_HOME:   /root/tomcat
Using CATALINA_TMPDIR: /root/tomcat/temp
Using JRE_HOME:        /usr
Using CLASSPATH:       /root/tomcat/bin/bootstrap.jar:/root/tomcat/bin/tomcat-juli.jar
Using CATALINA_OPTS:
Tomcat started.

# tomcat 동작 확인
[root@tomcat-250203 tomcat]# ss -tnlp
State      Recv-Q Send-Q Local Address:Port                Peer Address:Port
LISTEN     0      128                *:22                             *:*                   users:(("sshd",pid=898,fd=3))
LISTEN     0      100        127.0.0.1:25                             *:*                   users:(("master",pid=1279,fd=13))
LISTEN     0      1         [::ffff:127.0.0.1]:8005                        [::]:*                   users:(("java",pid=8235,fd=53))
LISTEN     0      100             [::]:8080                        [::]:*                   users:(("java",pid=8235,fd=43))
6. 웹 브라우저 접속 확인
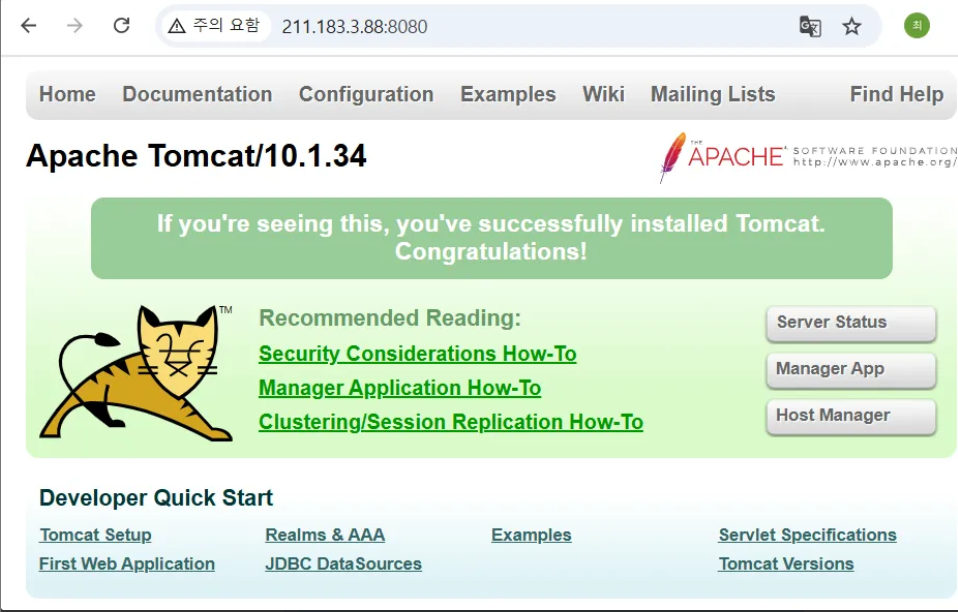
7. tomcat sample - sample 웹앱 배포
- sample.war 다운로드
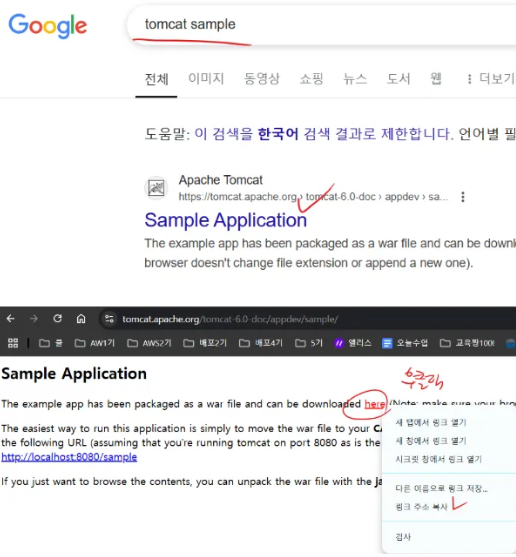
- sample.war 다운로드 ➡️ webapps 이동
[root@tomcat-250203 tomcat]# wget https://tomcat.apache.org/tomcat-6.0-doc/appdev/sample/sample.war
# sample.war 파일 다운로드

[root@tomcat-250203 tomcat]# ls
bin           conf             lib      logs    README.md      RUNNING.txt  temp     work
BUILDING.txt  CONTRIBUTING.md  LICENSE  NOTICE  RELEASE-NOTES  sample.war   webapps

# sample.war 파일 webapps  이동
[root@tomcat-250203 tomcat]# mv sample.war /root/tomcat/webapps

# webapps에 sample.war에 넣으면 자동으로 압축해제
# ROOT : jsp 파일의 루트디렉토리
[root@tomcat-250203 tomcat]# ls /root/tomcat/webapps
docs  examples  host-manager  manager  ROOT  sample  sample.war
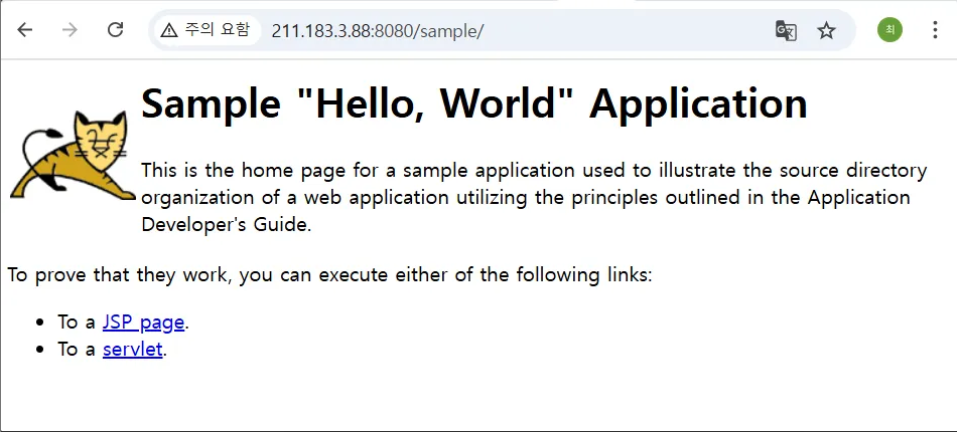
8. sample 확인 가능 - sample 웹앱 배포
- http://211.183.3.88:8080/sample/
- /root/tomcat/webapps : 웹 애플리케이션 루트 디렉토리
- /sample : sample.war이 압축 해제된 경로
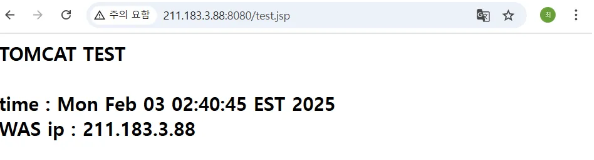
9. test.jsp 파일 생성 - jsp 파일 배포
# 경로 생성
[root@tomcat-250203 tomcat]# vi /root/tomcat/webapps/ROOT/test.jsp

[ .jsp 파일 내용 ]
<%@ page contentType="text/html; charset=UTF-8"%>
<html>
    	<head><title>hello world</title></head>
    	<body>
    	<h2>
            	TOMCAT TEST<br><br>
            	time : <%= new java.util.Date()%>
            	<%@ page import="java.net.InetAddress" %><br>
            	<%InetAddress inet= InetAddress.getLocalHost();%>
            	WAS ip : <%=inet.getHostAddress()%>
    	</h2>


    	</body>
</html>
10. test.jsp 확인 - jsp 파일 배포
11. tomcat 종료 - jsp 파일 배포
[root@tomcat-250203 tomcat]# ./bin/shutdown.sh
Using CATALINA_BASE:   /root/tomcat
Using CATALINA_HOME:   /root/tomcat
Using CATALINA_TMPDIR: /root/tomcat/temp
Using JRE_HOME:        /usr
Using CLASSPATH:       /root/tomcat/bin/bootstrap.jar:/root/tomcat/bin/tomcat-juli.jar
Using CATALINA_OPTS:
💡 실행/종료 대상
- /root/tomcat/bin/catalina.sh : foreground에서 실행
➡ catalina.sh를 실행시키면 foreground에서 작동해서 다른 작업을 하지 못 함 - /root/tomcat/bin/startup.sh ➡ catalina.sh를 background에서 실행
- /root/tomcat/bin/shutdown.sh ➡ catalina.sh를 background에서 종료
- 단, 나중에 container 환경에서는 반드시 foreground로 동작시켜야 하는 경우가 발생🌟
# catalina.sh -> foreground에서 실행
# => catalina.sh 직접 실행 시키지 않는 이유 : foreground로 작동해서 다른 작업을 하지 못함
# 나중에 container 환경에서는 반드시 foreground로 동작시켜야 하는 경우가 발생
[root@tomcat-250203 tomcat]# ls bin/
bootstrap.jar                 daemon.sh                     shutdown.sh
catalina.bat                  digest.bat                    startup.bat
catalina.sh                   digest.sh                     startup.sh
catalina-tasks.xml            makebase.bat                  tomcat-juli.jar
ciphers.bat                   makebase.sh                   tomcat-native.tar.gz
ciphers.sh                    migrate.bat                   tool-wrapper.bat
commons-daemon.jar            migrate.sh                    tool-wrapper.sh
commons-daemon-native.tar.gz  setclasspath.bat              version.bat
configtest.bat                setclasspath.sh               version.sh
configtest.sh                 shutdown.bat
12. DB 설정 후, mysql 패키지 설치 - DB 접속 성공 화면
[root@tomcat-250203 tomcat]# yum install -y mysql

# DB 접속 확인
[root@tomcat-250203 tomcat]# mysql -u tomcatuser -p1234 -h 211.183.3.6
Welcome to the MariaDB monitor.  Commands end with ; or \g.
Your MariaDB connection id is 13
Server version: 5.5.68-MariaDB MariaDB Server

Copyright (c) 2000, 2018, Oracle, MariaDB Corporation Ab and others.

Type 'help;' or '\h' for help. Type '\c' to clear the current input statement.

MariaDB [(none)]>
13. dbtest.jsp 생성 - DB 접속 성공 화면
- /root/tomcat/webapps/ROOT 밑에 생성
[root@tomcat-250203 ROOT]# vi dbtest.jsp

[ 수정 내용 ]
<%@ page language="java" contentType="text/html; charset=UTF-8" pageEncoding="UTF-8"%>
<%@ page import="java.sql.*"%>
<h1>DB</h2>
<%
        Connection conn=null;
        try{
                String Url="jdbc:mysql://211.183.3.6/tomcatdb";
                String Id="tomcatuser";
                String Pass="1234";

                Class.forName("com.mysql.jdbc.Driver");
                conn=DriverManager.getConnection(Url,Id,Pass);
                out.println("was-db Connection Success!");
        }catch(Exception e) {
                e.printStackTrace();
}
%>

[ 원본 서식 ]
cat <<EOF > dbtest.jsp

<%@ page language="java" contentType="text/html; charset=UTF-8" pageEncoding="UTF-8"%>
<%@ page import="java.sql.*"%>
<h1>DB</h2>
<%
        Connection conn=null;
        try{
                String Url="jdbc:mysql://<DB주소>/<DB이름>";
                String Id="<DB유저>";
                String Pass="<유저암호>";

                Class.forName("com.mysql.jdbc.Driver");
                conn=DriverManager.getConnection(Url,Id,Pass);
                out.println("was-db Connection Success!");
        }catch(Exception e) {
                e.printStackTrace();
}
%>

EOF
14. jdbc connector 설치 - DB 접속 성공 화면
- jdbc connector 라이브러리가 없기 때문에, java를 DB에 연동하기 위해 설치 필요
- jdbc 설치 경로 - jar 파일 경로 복사(버전에 따라 경로는 달라질 수 있음!)
https://mvnrepository.com/artifact/mysql/mysql-connector-java/8.0.23
[root@tomcat-250203 tomcat]# wget https://repo1.maven.org/maven2/mysql/mysql-connector-java/8.0.23/mysql-connector-java-8.0.23.jar
15. java-mysql-connector 라이브러리 추가 - DB 접속 성공 화면
- tomcat의 라이브러리 추가 ➡ tomcat 재시작 필요
# lib 추가
[root@tomcat-250203 tomcat]# mv mysql-connector-java-8.0.23.jar /root/tomcat/lib

# tomcat 재시작
[root@tomcat-250203 tomcat]# ./bin/shutdown.sh
Using CATALINA_BASE:   /root/tomcat
Using CATALINA_HOME:   /root/tomcat
Using CATALINA_TMPDIR: /root/tomcat/temp
Using JRE_HOME:        /usr
Using CLASSPATH:       /root/tomcat/bin/bootstrap.jar:/root/tomcat/bin/tomcat-juli.jar
Using CATALINA_OPTS:
[root@tomcat-250203 tomcat]# ./bin/startup.sh
Using CATALINA_BASE:   /root/tomcat
Using CATALINA_HOME:   /root/tomcat
Using CATALINA_TMPDIR: /root/tomcat/temp
Using JRE_HOME:        /usr
Using CLASSPATH:       /root/tomcat/bin/bootstrap.jar:/root/tomcat/bin/tomcat-juli.jar
Using CATALINA_OPTS:
Tomcat started.
16. DB 연결 확인 - DB 접속 성공 화면

DB
- 초기 설정은 기록을 건너뜀
1. mariadb-server 패키지 설치
[root@db-250203 ~]# yum install -y mariadb-server
[root@db-250203 ~]# systemctl restart mariadb
2. root 계정 암호화
[root@db-250203 ~]# mysql_secure_installation

NOTE: RUNNING ALL PARTS OF THIS SCRIPT IS RECOMMENDED FOR ALL MariaDB
      SERVERS IN PRODUCTION USE!  PLEASE READ EACH STEP CAREFULLY!

In order to log into MariaDB to secure it, we'll need the current
password for the root user.  If you've just installed MariaDB, and
you haven't set the root password yet, the password will be blank,
so you should just press enter here.

Enter current password for root (enter for none):
OK, successfully used password, moving on...

Setting the root password ensures that nobody can log into the MariaDB
root user without the proper authorisation.

Set root password? [Y/n] y
New password:
Re-enter new password:
Password updated successfully!
Reloading privilege tables..
 ... Success!


By default, a MariaDB installation has an anonymous user, allowing anyone
to log into MariaDB without having to have a user account created for
them.  This is intended only for testing, and to make the installation
go a bit smoother.  You should remove them before moving into a
production environment.

Remove anonymous users? [Y/n] yu^H
Remove anonymous users? [Y/n] y
 ... Success!

Normally, root should only be allowed to connect from 'localhost'.  This
ensures that someone cannot guess at the root password from the network.

Disallow root login remotely? [Y/n] n
 ... skipping.

By default, MariaDB comes with a database named 'test' that anyone can
access.  This is also intended only for testing, and should be removed
before moving into a production environment.

Remove test database and access to it? [Y/n] y
 - Dropping test database...
 ... Success!
 - Removing privileges on test database...
 ... Success!

Reloading the privilege tables will ensure that all changes made so far
will take effect immediately.

Reload privilege tables now? [Y/n] y
 ... Success!

Cleaning up...

All done!  If you've completed all of the above steps, your MariaDB
installation should now be secure.

Thanks for using MariaDB!
3. DB 생성 & User 생성 - 권한 부여
MariaDB [(none)]> create database tomcatdb

MariaDB [(none)]> grant all privileges on tomcatdb.* to tomcatuser@'%' identified by '1234';
Query OK, 0 rows affected (0.00 sec)

# tomcatuser를 통해 tomcatdb 접속 확인
[root@db-250203 ~]# mysql -u tomcatuser -p1234
Welcome to the MariaDB monitor.  Commands end with ; or \g.
Your MariaDB connection id is 12
Server version: 5.5.68-MariaDB MariaDB Server

Copyright (c) 2000, 2018, Oracle, MariaDB Corporation Ab and others.

Type 'help;' or '\h' for help. Type '\c' to clear the current input statement.


MariaDB [(none)]> show databases;
+--------------------+
| Database           |
+--------------------+
| information_schema |
| tomcatdb           |
+--------------------+
2 rows in set (0.00 sec)
Web Server
- 초기설정은 건너뜀
1. httpd 패키지 설치
[root@web-250204 ~]# yum install -y httpd
[root@web-250204 ~]# systemctl restart httpd
[root@web-250204 ~]# systemctl enable httpd
Created symlink from /etc/systemd/system/multi-user.target.wants/httpd.service to /usr/lib/systemd/system/httpd.service.
2. index.html 생성 - 정적 요청 확인
[root@web-250204 ~]# echo 'static file' > /var/www/html/index.html

# web server 기능 확인
[root@web-250204 ~]# curl 211.183.3.80
static file
3. Reverse Proxy 설정
- /etc/httpd/conf/httpd.conf 수정
- web Server에서 Reverse Proxy를 하기 위한 모듈이 필요 ➡️ 필요 모듈 위치 기입
[root@web-250204 ~]# vi /etc/httpd/conf/httpd.conf

[수정 내용]
     55 # 필요한 모듈이 담겨있는 라이브러리 폴더
     56 Include conf.modules.d/*.conf

     # 필요한 모듈 목록
     57 LoadModule proxy_connect_module modules/mod_proxy_connect.so
     58 LoadModule proxy_module modules/mod_proxy.so
     59 LoadModule proxy_http_module modules/mod_proxy_http.so
     60
     61 <VirtualHost *:80> # 80번 포트로 들어오는 모든 ip에 대한 설정
     62     ProxyRequests Off
     63     ProxyPreserveHost On
     64     <Proxy *>
     65         Order deny,allow
     66         Allow from all # 모든 클라이언트 허용
     67     </Proxy>
     68
     # /jsp : web 서버의 경로
     # http://211.183.3.88:8080 : WAS의 경로
     69     ProxyPass / http://211.183.3.88:8080/
     70     ProxyPassReverse /jsp http://211.183.3.88:8080/
71 </VirtualHost>- 누군가 웹 서버에 /jsp 경로로 들어오면 그 요청을 전부 211.183.3.88:8080/으로 전달
- Reverse Proxy 설정 서식
LoadModule proxy_connect_module modules/mod_proxy_connect.so
LoadModule proxy_module modules/mod_proxy.so
LoadModule proxy_http_module modules/mod_proxy_http.so

<VirtualHost *:80> # 80번 포트로 들어오는 모든 ip에 대한 설정
    ProxyRequests Off
    ProxyPreserveHost On
    <Proxy *>
        Order deny,allow
        Allow from all
    </Proxy>

    ProxyPass /jsp http://211.183.3.88:8080/
    ProxyPassReverse /jsp http://211.183.3.88:8080/
</VirtualHost>
4. httpd 재시작
- 기능에 변경이 생겼기 때문에 재시작
[root@web-250204 ~]# systemctl restart httpd
5. Test
# 정적인 요청
[root@web-250204 ~]# curl localhost:80/
static file

# 동적인 요청
[root@web-250204 ~]# curl localhost:80/jsp/dbtest.jsp


<h1>DB</h2>
was-db Connection Success!'CS > Linux' 카테고리의 다른 글
| [VMware] 15. VyOS & 실습 (0) | 2025.02.09 |
|---|---|
| [VMware] 14. ACL(Access Control List) - Standard & Extended (0) | 2025.02.06 |
| [VMware] 12-1. WORDPRESS(워드프레스) (1) | 2025.01.31 |
| [VMware] 11-2. 총 실습 - DNS / PxE(DHCP / TFTP / FTP / HTTP) - Kickstart / NFS Server & RAID / LVM (0) | 2025.01.28 |
| [VMware] 11-1. LVM(Logical Volume Manger) (0) | 2025.01.28 |


